
How To Mow Lines Into Your Lawn?
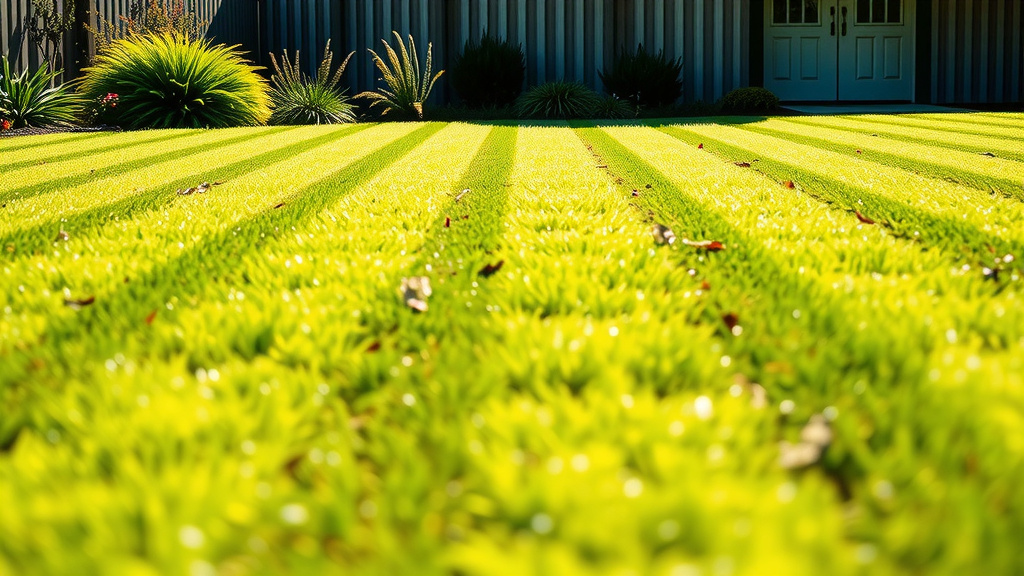
To mow lines into your lawn, you need a lawn mower with a roller or a striping kit, and you should always mow in alternating directions for each pass. This creates a bent grass effect, making lines visible as light reflects differently.
For the best results, use a sharp blade, mow when the grass is dry, and overlap your passes slightly to ensure consistent striping. Patience and practice are your best tools for achieving that professional look.
TL;DR: Want those classic lawn stripes? Here’s the quick rundown:
- Use a mower with a roller or add a striping kit.
- Always mow in alternating directions on each pass.
- Keep your mower blades sharp for clean cuts.
- Mow when your grass is dry, not wet.
- Overlap each pass slightly for perfect lines.
How To Mow Lines Into Your Lawn?
Creating those crisp, clean stripes on your lawn isn’t just for professional groundskeepers. You can achieve this look right in your own backyard!
It’s all about how light interacts with grass blades that are bent in different directions, giving that beautiful two-tone effect.
The Secret to Striking Stripes: Grass Direction
Have you ever noticed how carpet looks darker or lighter depending on the direction you brush it? Grass works similarly. When you mow, the mower’s roller or wheels push the grass blades down.
If you mow one way, the blades lean forward. Mow the other way, and they lean back. This difference in lean creates the illusion of stripes as sunlight hits the grass from various angles (Purdue University Extension).
What You Need for Perfect Lines
Getting those golf course-quality stripes really comes down to your equipment. You don’t need a fancy, expensive setup, but a few key items help.
A good mower and a commitment to detail are your best friends here. Let’s look at what helps you get started.
Choosing the Right Mower for Stripping
Most mowers can create some level of striping, but some are definitely better. We found that mowers with heavier rollers work wonders.
Reel mowers often produce the best stripes because of their design and how they cut and bend the grass.
Rotary Mowers vs. Reel Mowers
Rotary mowers are common for home use. They cut with a horizontal blade. While they can stripe, the effect is often less dramatic.
Reel mowers, on the other hand, use a scissor-like action. They cut very cleanly and often have integrated rollers, making them excellent for striping.
Adding a Stripping Kit or Roller
If your mower doesn’t have a built-in roller, don’t worry! You can often add a stripping kit. These kits attach to the back of your mower.
They are designed to press down the grass after it’s cut, enhancing the stripe effect. Many experts say a simple DIY roller, like a weighted PVC pipe, can also work.
Essential Tools for Striping Success
Beyond your mower, a few other things can make a big difference. Think about the small details that elevate your lawn care.
Having the right accessories on hand helps you achieve consistent, clean stripes every time you mow.
- Sharp Blades: Dull blades tear grass, leaving ragged edges. Sharp blades cut cleanly, promoting healthier grass and better stripe definition.
- Grass Catcher: While not essential for striping, catching clippings prevents them from interfering with the stripe pattern.
- Measuring Tape (optional): Helpful for planning your first pass and ensuring straight lines, especially if you’re a beginner.
Preparing Your Lawn for Striping
A beautifully striped lawn starts with a well-maintained lawn. You wouldn’t paint a dirty wall, right?
The same logic applies here: healthy grass takes stripes better. Think of it as laying the groundwork for your masterpiece.
Mow When Grass is Dry
Always mow when your grass is dry. Wet grass clumps, weighs down your mower, and doesn’t bend uniformly. This can lead to uneven, muddy-looking stripes.
Wait for dew to evaporate before you start your mowing routine. This is a common recommendation (University of Maryland Extension).
Maintain Optimal Grass Height
Taller grass bends more easily, creating a more visible stripe. We found that a cutting height of 2.5 to 3 inches is ideal for striping.
Avoid scalping your lawn by cutting too short; this stresses the grass and harms its ability to stripe effectively.
The Mowing Pattern: Your Artistic Canvas
This is where the magic happens! Your mowing pattern is what truly creates those stunning lines. It’s like painting a picture, one stroke at a time.
Think of each pass as a brushstroke. You want them to be deliberate and consistent.
Mowing in Alternating Directions
The core technique is simple: mow in one direction, then turn around and mow in the opposite direction right next to your first pass. Repeat this pattern across your entire lawn.
This alternating method ensures that each stripe of grass is bent in the opposite direction of its neighbor.
Overlapping Your Passes
Don’t leave gaps! Overlap each pass by about 2-4 inches. This ensures a seamless transition between stripes and prevents any un-mowed strips of grass.
Consistent overlap is key for a uniform, professional appearance, many lawn care guides suggest.
Getting Your First Stripe Straight
Your first stripe sets the tone for the entire lawn. Take your time to make it perfect. It’s like drawing your first line on a blank page.
A straight first pass makes all subsequent passes easier to line up. Focus on a distant object to guide you.
Using a Fixed Point for Guidance
Pick a tree, a fence post, or even a stake at the far end of your lawn. Focus your eyes on that point as you make your first pass.
This helps you keep your mower moving in a straight line, avoiding unintentional curves.
Dealing with Edges and Turns
The edges of your lawn and the turns can be tricky. You want your stripes to look neat right up to the border.
Planning your turns carefully helps maintain the overall visual appeal of your striped lawn.
Making Clean Turns
When you reach the end of a row, turn your mower on an un-mowed section of grass. This keeps your stripes crisp and avoids damaging previously mowed areas.
You can then mow these turning strips at the very end, often in a perpendicular direction to the main stripes.
Maintaining Your Striped Lawn
Once you’ve achieved those beautiful lines, you want them to last. Regular care is essential.
A little ongoing effort ensures your lawn continues to look its best and that your stripes remain prominent.
Regular Mowing Schedule
Mow your lawn regularly, typically once a week during peak growing season. This maintains the stripe effect and keeps your grass healthy.
The stripes will fade over time as grass blades stand back up, so consistent mowing is necessary to renew them.
Varying Your Mowing Direction
While alternating directions is key for striping, it’s a good idea to occasionally change the overall direction of your stripes (e.g., vertical one week, horizontal the next). This prevents ruts and promotes more even grass growth.
Research often connects varied mowing patterns with healthier turf (National Center for Biotechnology Information).
Common Striping Mistakes to Avoid
Even with the best intentions, you might encounter a few hurdles. Knowing what to watch out for helps you correct course quickly.
We’ve found that these missteps are easily preventable with a little awareness.
| Mistake | Why It Happens | How to Fix It |
|---|---|---|
| Uneven stripes | Inconsistent overlap, wavy first pass | Focus on a straight first pass, overlap consistently by 2-4 inches |
| Faint stripes | Dull blades, grass too short, wet grass | Sharpen blades, raise cutting height, mow when dry |
| Damaged grass | Turning too sharply on mowed areas | Turn on un-mowed grass at the ends, mow turnarounds last |
Checklist for Striping Success
Ready to get started? Here’s a quick checklist to guide you:
- Is your mower blade sharp?
- Is your grass dry?
- Is your cutting height set to 2.5-3 inches?
- Do you have a roller or striping kit?
- Have you picked a fixed point for your first pass?
- Are you ready to overlap each pass?
Conclusion
Mowing lines into your lawn is a rewarding process that transforms your yard into something special. It’s a combination of the right tools, careful preparation, and a consistent technique.
Remember, practice makes perfect. Don’t be discouraged if your first attempts aren’t flawless. With each mow, you’ll gain confidence and skill, creating those stunning stripes you’ve always admired.
So, grab your mower, set your sight on a distant point, and enjoy the satisfaction of a beautifully striped lawn.
How long do lawn stripes last?
Lawn stripes usually last until the grass blades naturally stand back up, which typically takes a few days to a week, depending on the grass type, growth rate, and weather conditions. Frequent mowing helps maintain the striped appearance.
Can I stripe my lawn with any type of grass?
Most common lawn grasses, such as Kentucky bluegrass, fescue, and perennial ryegrass, can be striped effectively because they are flexible enough to be bent by a mower’s roller. Thicker, stiffer grass types might show less dramatic striping.
Does striping my lawn harm the grass?
No, striping your lawn does not harm the grass. It simply bends the grass blades. As long as you maintain a proper cutting height and use sharp blades, striping actually encourages a healthy, lush appearance.
How often should I change my mowing pattern?
While you’ll alternate directions within each mow to create stripes, it’s beneficial to change the overall striping direction (e.g., north-south one week, east-west the next) every few weeks. This helps prevent ruts and promotes more even grass growth.
Are there different types of stripe patterns I can try?
Absolutely! Once you master basic straight lines, you can experiment with checkerboard patterns, diagonal stripes, or even create unique designs. The principle remains the same: alternate the direction of cut for each stripe segment.
