
How To Test Spark On Lawn Mower?
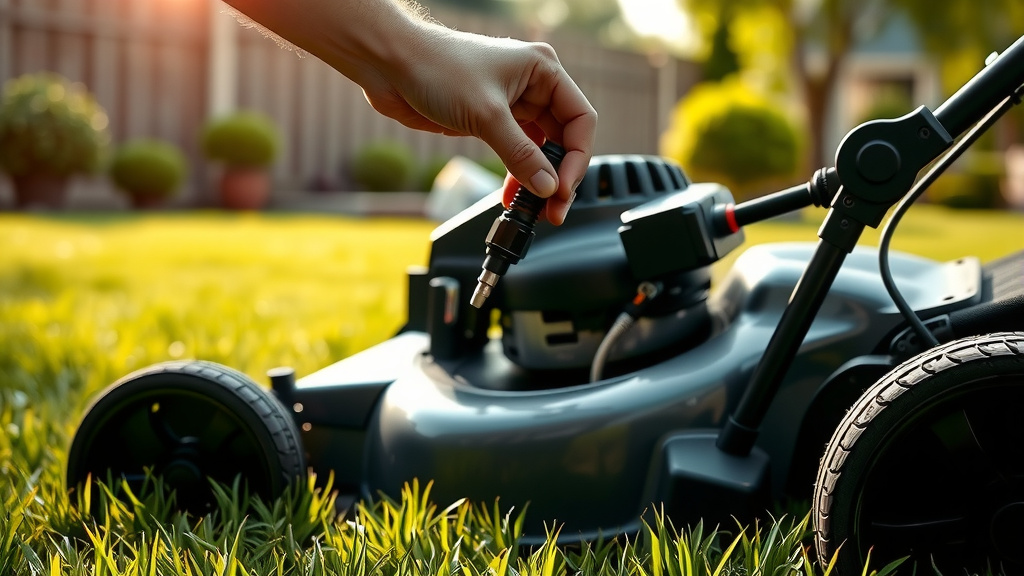
To test the spark on your lawn mower, disconnect the spark plug wire, remove the plug, and attach a spark tester between the wire and the plug, grounding the plug’s metal body.
Pull the starter cord to observe for a bright, consistent blue or white spark, indicating good ignition system health for your lawn mower.
- No spark often means your mower won’t start.
- Always prioritize safety; disconnect the wire before touching the plug.
- You’ll need a spark plug wrench, a spark tester, and gloves for protection.
- A strong, bright spark confirms the ignition is working correctly.
- A missing or weak spark points to issues like a bad plug or ignition coil.
Ever pull that starter cord on your lawn mower, hear the engine churn, but nothing happens? It’s a common, frustrating scenario. Often, the heart of the problem lies with your spark plug and its ability to create a spark. Without a good spark, your engine simply cannot ignite the fuel and get to work.
But don’t fret! Learning how to test spark on your lawn mower is a basic yet powerful skill. It helps you pinpoint ignition issues quickly, saving you time and maybe even a trip to the repair shop. We’ll walk you through the process, step by step, so you feel confident tackling this essential mower check.
How To Test Spark On Lawn Mower?
To test the spark on your lawn mower, you need to safely check if the spark plug is receiving and delivering electrical current. This involves removing the plug, grounding it correctly, and then observing for a visible spark as you try to start the engine. It’s a straightforward diagnostic.
Why Is Spark So Important for Your Mower?
Think of your lawn mower engine as needing three things to run: fuel, air, and spark. The spark is the ignition source, like lighting a match to kindling. It ignites the fuel-air mixture in the combustion chamber, pushing the piston down and starting the engine’s cycle. No spark means no fire, no combustion, and definitely no mowing!
If your mower isn’t starting, or it sputters and dies, a faulty spark is a prime suspect. Many experts say checking the spark plug is often the first diagnostic step when an engine won’t crank (Briggs & Stratton knowledge base).
What You’ll Need: Tools of the Trade
Before you get started, gather a few simple tools. Having them ready makes the process much smoother. You likely have most of these lying around your garage.
- A spark plug wrench (or a deep socket wrench of the correct size)
- A spark plug gap tool (optional, but helpful for inspection)
- A dedicated spark tester (highly recommended for accuracy)
- Or, insulated pliers/gloves if attempting the DIY method
- Safety glasses
- Work gloves
- Rag or shop towel
Safety First: A Quick Word of Caution
Working with engine components and electricity means safety can’t be an afterthought. Always disconnect the spark plug wire from the plug before you do anything else. This prevents accidental starting while you’re working near moving parts.
Also, remember that spark plugs deal with high voltage. Always wear safety glasses and work gloves to protect your eyes and hands. We want you to stay safe while getting your mower back in shape!
Step-by-Step: The Spark Test Process
Ready to get your hands a little dirty? Follow these steps carefully, and you’ll have a clear answer about your spark in no time.
Step 1: Disconnect the Spark Plug Wire
Locate the spark plug on your engine. It’s usually a cylindrical component with a thick rubber or plastic boot attached. Gently but firmly pull the boot off the spark plug. It might take a little wiggle, but don’t yank it by the wire itself.
Step 2: Remove the Spark Plug
Using your spark plug wrench, carefully remove the spark plug. Turn it counter-clockwise. Once it’s loose, you can often finish unscrewing it by hand. Take care not to drop it, as damaging the ceramic insulator can ruin the plug.
Take a moment to inspect the plug itself. Is it really black and oily? Is there excessive carbon buildup? This visual check can tell you a lot about your engine’s health too.
Step 3: Connect Your Spark Tester
A dedicated spark tester is the safest and most reliable way to check for spark. It creates a controlled gap for the spark to jump, making it easy to see.
| Spark Tester Type | Pros | Cons |
|---|---|---|
| Inline Spark Tester | Very safe, clear visual, no direct contact with plug. | Requires a separate purchase. |
| Adjustable Spark Tester | Allows setting different gap sizes, versatile for different engines. | Slightly more complex to use. |
To use an inline tester, attach one end to the disconnected spark plug wire. Then, attach the other end of the tester to the spark plug itself. Make sure connections are secure.
Step 4: Grounding the Spark Plug (Crucial!)
If you don’t have a spark tester and are attempting the DIY method (using the removed spark plug), this step is vital for your safety and accurate results. Hold the spark plug’s threaded metal body firmly against a clean, unpainted metal part of the engine block. You can use insulated pliers for a better grip and added safety.
This creates a ground path for the electricity. Without proper grounding, the electricity has no path to travel, and you won’t see a spark (and it can be dangerous!).
Step 5: Pull the Starter Cord
With everything set up and safely grounded, it’s time for the moment of truth. Pull the starter cord briskly, just as you would when trying to start the mower. You might need to pull it a few times to observe the spark.
Keep your eyes focused on the tip of the spark plug or the window of your spark tester. This is where the magic (or lack thereof) happens!
Step 6: Observe the Spark
What are you looking for? A healthy ignition system will produce a strong, bright, blue or white spark. It should be consistent with each pull of the cord. If you see this, congratulations – your spark plug and ignition system are likely in good shape!
What Does a Good Spark Look Like?
A good spark is like a tiny bolt of lightning. It’s typically a vivid blue, sometimes white, and crackles with energy. It should be easy to see and consistent with each pull. Many sources, including repair manuals, describe it as a “fat and sassy” spark, suggesting its strength and visual impact.
If you see a weak, yellow, or inconsistent spark, or no spark at all, it’s a sign of trouble. Don’t worry, we’ll cover what to do next.
What If You See No Spark or a Weak One?
Seeing no spark or a weak, flickering one is certainly a bummer. But it means you’ve successfully identified the problem area! Now you can narrow down the potential causes. Often, it’s a simple fix.
Here’s a quick checklist to help you troubleshoot:
- Is the spark plug wire seated firmly on the plug (or tester)?
- Is the spark plug itself clean and gapped correctly?
- Are the spark plug’s metal threads making good contact with the engine block?
- Is there enough fuel in the tank? (Sometimes a simple oversight!)
- Is the mower’s kill switch in the “Run” position?
Common Causes of No Spark
If you’re still not getting a good spark, these are the usual suspects. Let’s look at each one.
Bad Spark Plug
This is probably the most common reason. Spark plugs wear out over time, collecting carbon deposits or simply failing internally. They are designed to be replaced periodically. A dirty or fouled spark plug struggles to create a strong spark.
Try replacing your old spark plug with a new one that matches your mower’s specifications. It’s a relatively inexpensive part and often solves the problem instantly.
Faulty Spark Plug Wire
The spark plug wire delivers the high voltage from the ignition coil to the plug. If this wire is cracked, frayed, or has a poor connection, the electricity won’t reach the plug efficiently. Inspect the wire for any visible damage or corrosion.
Sometimes, simply reseating the wire firmly can help. If the wire looks damaged, it might need to be replaced. Research often shows that wire integrity is key for consistent spark (Automotive Repair Manuals).
Ignition Coil Problems
The ignition coil is like a transformer, taking low voltage from the battery or flywheel and converting it into the very high voltage needed for the spark plug. If the coil is failing, it won’t produce enough juice. This is a less common issue but can happen, especially on older mowers.
Diagnosing a bad ignition coil usually requires a multimeter and a bit more technical know-how. Many experts advise taking it to a professional if you suspect the coil, as it can be a trickier component to replace.
Kill Switch Issues
Many lawn mowers have a kill switch or a safety bar that must be held down to operate. If this switch is faulty or stuck in the “off” position, it can prevent the engine from sparking. Check that the safety features are engaged correctly and not stuck.
This is a surprisingly frequent culprit for “no spark” issues. It’s a good idea to ensure all safety mechanisms are functioning properly.
Low Engine Oil (for some models)
Some modern lawn mowers are equipped with a low oil sensor that prevents the engine from starting or sparking if the oil level is too low. This is a protective measure to prevent engine damage. Always check your oil level! If it’s low, add the correct type of oil to the proper mark. This is especially true for mowers with built-in engine safeguards (Husqvarna owner guides).
Troubleshooting Beyond the Spark
So, you’ve got a beautiful, strong spark, but your mower still won’t start? Don’t despair. It just means the problem lies elsewhere. Remember those other two ingredients for combustion? Fuel and air.
You might need to check your fuel filter for clogs, ensure your carburetor isn’t gummed up, or verify that the air filter isn’t completely choked. These are all common reasons for a mower failing to start, even with a perfect spark. But for today, you’ve mastered the art of the spark test!
Conclusion
Testing the spark on your lawn mower is a fundamental step in troubleshooting a non-starting engine. It’s a skill that empowers you to diagnose problems efficiently and keep your equipment running smoothly. By following our simple, safe steps, you can quickly determine if your ignition system is delivering the vital spark your mower needs.
Remember, a strong blue or white spark indicates good health, while a weak or absent spark points to deeper issues. Don’t let a simple lack of spark keep you from a pristine lawn. Take charge, perform this test, and get back to enjoying your yard work!
What tools do I need to test a lawn mower spark plug?
You will need a spark plug wrench (or deep socket), safety glasses, work gloves, and preferably a dedicated spark tester. Insulated pliers can be used for grounding the spark plug if you don’t have a tester.
What color should a healthy spark be on a lawn mower?
A healthy spark on a lawn mower should be bright, consistent, and typically blue or white. A weak, yellow, or intermittent spark often indicates a problem with the ignition system or the spark plug itself.
Can I test for spark without a special spark tester?
Yes, you can test for spark without a special tester by carefully grounding the removed spark plug against a clean, unpainted metal part of the engine block. However, using a spark tester is generally safer and provides clearer results.
How often should I check or replace my lawn mower’s spark plug?
Many manufacturers recommend checking your spark plug annually and replacing it every 25 hours of operation, or at the start of each mowing season. This helps ensure optimal engine performance and easier starting.
My mower has spark but still won’t start; what else could be wrong?
If your mower has a strong spark but won’t start, the issue likely lies with the fuel or air system. Check for stale fuel, a clogged fuel filter, a dirty carburetor, or a restricted air filter. These are common next steps in troubleshooting.
