How To Replace Pull String On Toro Lawn Mower?
Replacing the pull string on your Toro lawn mower involves carefully removing the old cord and threading a new one through the recoil starter mechanism.
Always disconnect the spark plug wire first to prevent accidental engine starts and ensure your safety during this essential repair.
- You’ll need to remove the engine shroud and recoil starter to access the string mechanism.
- Unwind the old string and carefully manage the recoil spring tension; this is a key step.
- Thread your new, correctly sized pull string through the housing and knot it securely.
- Reassemble everything, ensuring the spark plug wire is the last thing you reconnect.
How To Replace Pull String On Toro Lawn Mower?
Replacing your Toro lawn mower’s pull string might seem a bit daunting, but it’s a very manageable DIY project. You can absolutely get your mower humming again with some patience and the right steps.
Why Does Your Pull String Break?
Have you ever wondered why that pull string gives up the ghost right when you need it most? It’s often a combination of wear, tear, and maybe a little too much enthusiasm with the pull. Over time, the string frays from repeated friction.
Experts often point to factors like exposure to UV light and moisture, which can weaken the fibers (Toro Maintenance Guide). Sometimes, a sudden, hard jerk can also put too much stress on an already weakened cord, causing it to snap.
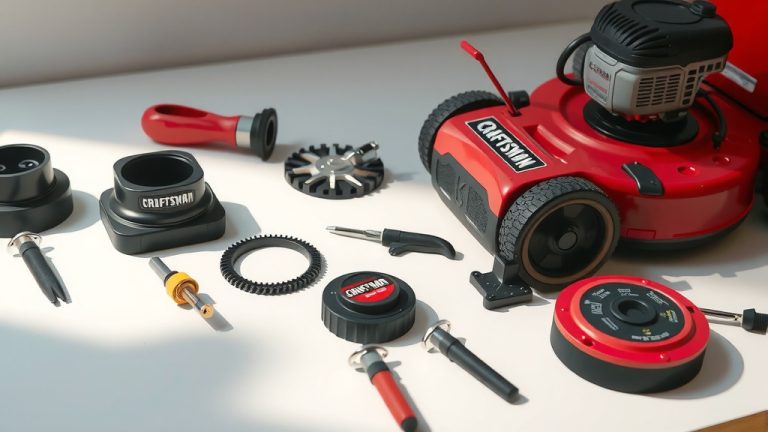
Gathering Your Tools
Before we dive in, let’s make sure you have everything ready. Think of it like a surgeon preparing for an operation – you wouldn’t want to stop midway to search for a tool, right? Having your tools handy makes the job smoother.
We found that having the right items saves a lot of frustration. Most of these are likely already in your garage. You will also need some specific items related to your lawn mower model.
Quick Checklist Before Starting
- New pull string (check your mower manual for diameter and length)
- Flathead screwdriver
- Phillips head screwdriver
- Pliers (needle-nose are often best)
- Socket wrench set (for shroud bolts)
- Utility knife or sharp scissors
- Work gloves (for grip and protection)
Safety First, Always!
Before touching anything, the first and most critical step is safety. You wouldn’t want your mower to surprise you with a spin of the blade. Disconnect the spark plug wire immediately. This prevents any accidental engine starts, keeping your fingers safe.
Many guidelines point to this as a good first step (Occupational Safety and Health Administration). You should also let the engine cool down completely if you’ve just been using it. Hot engine parts can cause burns.
Getting Started: Accessing the Recoil Starter
Okay, with safety squared away, let’s get to the heart of the matter. Your pull string lives inside the recoil starter assembly, which is usually found on top of the engine. It’s often tucked away under an engine shroud or cover.
You’ll need to remove a few bolts or screws to get at it. Take a moment to observe how everything fits together; maybe even snap a quick photo with your phone. This makes reassembly much easier later on.
Removing the Recoil Assembly
Use your socket wrench or screwdriver to remove the bolts holding the recoil starter. These are usually located around the perimeter of the assembly. We often find that keeping screws organized helps prevent losing them. A small magnetic tray works wonders.
Once the bolts are out, gently lift the recoil assembly away from the engine. It might be a little snug, but it should come off without too much force. Don’t worry if it feels a little stiff; they are designed to fit snugly.
Removing the Old Pull String
Now that the recoil starter is off, you’ll see the old, broken pull string. If a piece of it is still jammed in the handle or the recoil drum, pull it out. You’ll probably see the knot that held it in place.
This is where things can get a little tricky: the recoil spring. It’s under tension. You need to release any remaining tension on the spring. Gently pull out the remaining string and let the recoil slowly unwind itself. If the spring pops out completely, don’t panic, but note its orientation. Many experts say patience is key here.
Winding the Recoil Spring (Crucial Step!)
This is arguably the most important part of the process for proper pull string function. The recoil spring needs to be wound correctly to provide the tension that retracts the string. You might notice a small notch or hole on the recoil drum.
Without the string, you’ll need to manually wind the drum. Turn it clockwise until you feel resistance, usually about 3-5 full turns. Hold it there, so it doesn’t unwind. This takes a bit of dexterity. You might need an extra hand, or secure it with a clamp (Power Equipment Research, University of Georgia).
Threading the New Pull String
With the spring wound, now you can thread the new pull string. Push one end of the new string through the small hole in the recoil drum. Ensure the drum is still held under tension. Some people find using needle-nose pliers helpful for guiding the string.
Then, thread the string through the exit hole in the recoil starter housing. Once it’s through, you can let go of the wound drum slowly. The spring tension should pull the string partially back in. Leave enough string out to tie a knot.
Tying the Knot Correctly
Securing the string properly is paramount. You need a knot that won’t slip and is strong enough to withstand repeated pulls. A simple overhand knot or a figure-eight knot works well at the end inside the drum. Make sure it’s snug against the drum hole.
For the handle end, thread the string through the handle and tie another secure knot. A double overhand knot or a fisherman’s bend is often recommended for maximum durability and grip. Trim any excess string, leaving about half an inch.
Reattaching the Handle
Once the string is knotted at both ends, guide the handle back into its slot on the recoil starter housing. Ensure the string moves freely and doesn’t snag anywhere. Give it a gentle pull to test the retraction.
It should pull out smoothly and retract fully. If it’s sticky, you might need to check your knot or if the string is rubbing against the housing. Don’t force it; smooth operation is the goal.
Reassembling the Recoil Starter
Now, carefully position the recoil starter assembly back onto the engine. Align the mounting holes with the bolts you removed earlier. Reinsert all the bolts and tighten them securely with your socket wrench or screwdriver.
Make sure not to overtighten, as this can strip threads or crack the housing. A firm, snug fit is what we’re aiming for. It should feel stable and not wiggle around.
Testing Your New Pull String
Before you get too excited, let’s do a final check. Give the string a few slow pulls. Does it pull out easily? Does it retract fully? If so, great job! Now, you can finally reconnect the spark plug wire. This is the last step.
Give it a real starting pull. If your Toro fires up, you’ve done it! You’ve not only fixed your mower but also gained a valuable skill. If it doesn’t, we can troubleshoot a bit.
Common Pitfalls and Troubleshooting
Sometimes, things don’t go perfectly the first time. Don’t worry; that’s part of learning. We often encounter a few common issues that are usually simple to fix. A little patience goes a long way here.
Many issues stem from the recoil spring not being wound correctly, or the string not being the correct size. We’ve compiled some common problems and their quick fixes to help you out.
String Snaps Again?
If your new string snaps quickly, it might be due to a few reasons. Perhaps the string wasn’t the correct diameter for your mower (too thin), or there’s a sharp edge inside the housing that’s fraying it. Inspect the housing for any burrs.
Also, a very abrupt pull can sometimes put excessive strain on a new string. Aim for a smooth, steady pull motion. Research suggests proper pulling technique can significantly extend string life (Small Engine Repair Manuals).
Recoil Not Catching?
If the pull string just pulls out without engaging the engine, or doesn’t retract, the recoil spring might not be wound correctly, or the pawls (the little teeth that grab the flywheel) are stuck. Disassemble and re-check the spring tension.
You can also check the pawls for debris or wear. Sometimes a little clean-up or a tiny drop of light oil on the pawl pivot points can bring them back to life. Avoid heavy grease, as it can attract dirt.
| Issue | Possible Cause | Quick Fix |
|---|---|---|
| String doesn’t retract fully | Insufficient spring tension | Rewind the spring more turns |
| String pulls out, no engine engagement | Pawls are stuck or worn | Clean or replace pawls |
| String feels stiff/snags | Improper string routing or wrong diameter | Re-route string, ensure correct size |
| New string breaks quickly | Sharp edges in housing, incorrect string type | Inspect housing, use correct string material |
Conclusion
Replacing the pull string on your Toro lawn mower is a rewarding project that extends your mower’s life and saves you money. By following these steps – from ensuring safety to carefully managing the recoil spring – you can restore your mower’s starting power.
You’ve now got the know-how to tackle this common repair. Keep your tools handy, practice patience, and soon you’ll be back to enjoying a perfectly manicured lawn. Great job!
How do I know what size pull string I need for my Toro mower?
The correct pull string size for your Toro mower is typically found in your owner’s manual. It will specify both the diameter (e.g., 5/32 inch) and the required length. Using the wrong size can lead to premature wear or improper function.
Can I use any rope as a pull string replacement?
No, it’s not recommended to use just any rope. Lawn mower pull strings are specially designed with particular materials, like nylon or polyester, for strength, abrasion resistance, and flexibility. Regular rope might stretch, fray quickly, or snap under the stress of engine starting.
What if the recoil spring pops out completely?
If the recoil spring pops out, don’t panic. Carefully place it back into its housing. Pay close attention to its orientation; one end usually hooks into the housing, and the other into the recoil drum. This can be a bit tricky, and a quick online video for your specific model can be very helpful.
How often should I replace my pull string?
There’s no fixed schedule; replace your pull string when you notice signs of wear, such as fraying, stretching, or difficulty in retraction. Proactive replacement when you see damage can prevent a sudden breakdown during peak mowing season.
Is it possible to replace just the handle if it breaks?
Yes, you can often replace just the pull handle if it’s broken. This is usually a simpler task than replacing the entire string. You’ll just need to untie the old handle, thread the string through the new one, and tie a secure knot.