How To Replace Toro Lawn Mower Traction Cable?

Replacing a Toro lawn mower traction cable typically involves disconnecting the spark plug, gaining access to the old cable’s attachment points on the engine and control handle, then removing and installing the new cable.
This process generally takes about 30-60 minutes, depending on your comfort level with small engine repairs and the specific Toro model you own.
- Understand the common signs of a failing traction cable.
- Gather essential tools like wrenches, pliers, and the new cable.
- Prioritize safety by disconnecting the spark plug first.
- Follow a step-by-step guide for removal and installation.
- Perform a quick test run to ensure proper function.
How To Replace Toro Lawn Mower Traction Cable?
Replacing your Toro lawn mower’s traction cable is a straightforward repair that can bring your self-propelled feature back to life. It involves a few simple steps to get your mower moving again without a struggle.
Why Does Your Traction Cable Fail?
You might wonder why these cables give out. Over time, the constant pulling and releasing action causes wear and tear. Moisture can also seep in, leading to rust and corrosion inside the cable housing.
We found that many experts attribute cable failure to factors like frequent use and environmental exposure (Mechanics Today). Sometimes, debris can also get caught, hindering its smooth operation.
Is It Time For a Replacement?
How do you know if your traction cable is the culprit? Your mower might still start, but the self-propelled function feels weak or doesn’t work at all. It’s a common issue that many homeowners face.
Perhaps you feel a lack of tension when you engage the drive lever, or the mower just rolls along. Let’s check a few signs:
- Mower doesn’t self-propel.
- Handle feels loose when engaging drive.
- Cable appears frayed or broken.
- Engine revs but wheels don’t move.
- Hear grinding noises from the drive system.
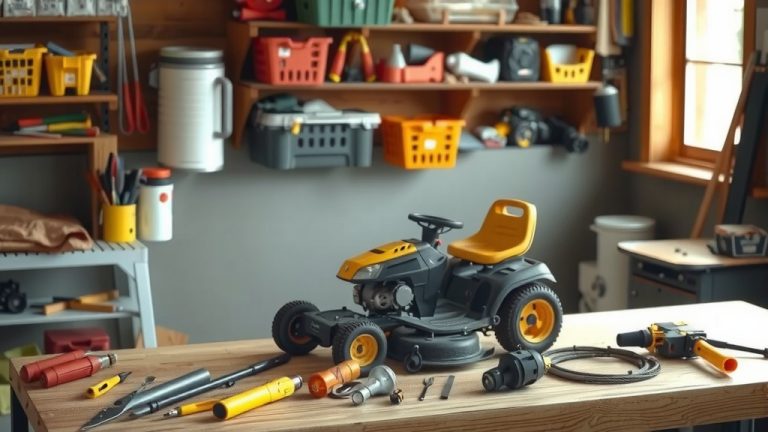
Gathering Your Tools and Supplies
Before you begin, gathering everything makes the job smoother. Think of it like cooking; you wouldn’t start without all your ingredients. You’ll need the right tools to tackle this repair effectively.
Make sure you have your new Toro traction cable handy. Finding the correct part number for your mower model is vital. You can usually locate this in your owner’s manual or on Toro’s website.
| Item | Purpose |
|---|---|
| New Toro Traction Cable | The replacement part itself. |
| Socket Wrench Set | For bolts holding covers and clamps. |
| Pliers (Needle-nose/Standard) | To manipulate cable ends and springs. |
| Screwdriver Set | For removing plastic covers. |
| Work Gloves | Protecting your hands during work. |
Safety First, Always!
Before touching anything, safety is your top priority. Always disconnect the spark plug wire. This prevents the engine from accidentally starting while you’re working on it. Nobody wants an unexpected surprise.
Ensure the mower is on a flat, stable surface. Consider wearing safety glasses to protect your eyes from any flying debris or dirt. A little caution goes a long way here.
Step-by-Step Guide: The Replacement Process
Alright, let’s get your hands dirty! This process is quite manageable even for a novice. Just follow these steps carefully, and you’ll have your mower running like new in no time.
Step 1: Disconnect the Spark Plug
Locate the spark plug on your engine. It usually has a rubber boot covering it. Simply pull the boot off the spark plug to prevent any accidental starts. This is a critical safety measure.
Step 2: Accessing the Cable
You’ll need to expose the cable’s routing. This often means removing a plastic cover on the engine or drive system. Use your screwdriver or wrench to undo any bolts or screws holding it in place.
Many models have the cable running along the handle, secured by clips or zip ties. Carefully unclip these as you follow the cable’s path. Take note of how it’s routed for easier reassembly.
Step 3: Removing the Old Cable
First, detach the cable from the control handle. This is typically held by a small Z-bend or a spring mechanism. Use your pliers to carefully release it. Don’t force anything; gentle manipulation usually works.
Next, move to the engine or drive system end. The cable usually connects to a lever or pulley. You might need a wrench to loosen a bolt or simply unhook a spring. Remove the entire old cable once it’s free.
Step 4: Installing the New Cable
Route the new cable exactly as the old one was. This is where those mental notes or photos come in handy! Secure it with any clips or zip ties you removed earlier along the handle. Proper routing prevents tangling.
Attach the new cable to the engine or drive system lever first. Ensure it’s securely fastened. Then, connect the other end to the control handle. Make sure there’s some tension on the cable when the drive lever is disengaged, but not too much.
Some models allow for tension adjustment. Consult your owner’s manual for specific instructions on adjusting your particular Toro model. You want enough tension for engagement, but not so much it causes constant drag.
Step 5: Testing Your Mower
Reconnect the spark plug wire. Start your mower in a safe, open area. Engage the drive lever. Does it move forward smoothly? Does it disengage properly when you release the lever?
If it feels sluggish or too aggressive, you might need to fine-tune the cable tension. A little adjustment can make a big difference in how your mower performs. We found that a few test runs help dial it in perfectly.
Tips for a Longer-Lasting Cable
Want to avoid frequent replacements? A little preventative care can extend your traction cable’s lifespan. Keeping it clean and free from debris is a good start.
- Regularly check for signs of fraying or damage.
- Keep the cable clean and lubricate it occasionally with a dry lubricant (many experts recommend this for smooth operation).
- Store your mower in a dry place to prevent rust.
- Avoid sharp bends or kinks in the cable’s routing.
- Always engage and disengage the drive lever smoothly, not harshly.
Conclusion
Replacing your Toro lawn mower traction cable is a manageable DIY task. By following these steps, prioritizing safety, and using the right tools, you can restore your mower’s self-propelled function. This empowers you to keep your lawn looking great without the extra effort of pushing a heavy machine. Take pride in knowing you fixed it yourself!
How do I know if my Toro traction cable is bad?
Your Toro traction cable is likely bad if the self-propel feature isn’t working, the drive lever feels unusually loose or has no resistance, or you can visibly see fraying or breakage on the cable itself.
Can I use a universal traction cable for my Toro mower?
Using a universal traction cable is generally not recommended. Specific Toro models have unique cable lengths, attachments, and housing designs. Using a genuine OEM or direct-fit aftermarket part ensures proper function and safety.
What tools do I need for this replacement?
You will typically need a socket wrench set, a screwdriver set (flathead and Phillips), pliers (especially needle-nose), and work gloves. Having a headlamp can also be helpful for better visibility in tight spaces.
How long does it take to replace a Toro traction cable?
For most homeowners, replacing a Toro traction cable can take anywhere from 30 minutes to an hour. Experienced DIYers might finish quicker, while first-timers should allow ample time to follow each step carefully.
What if my mower still doesn’t self-propel after replacing the cable?
If your mower still doesn’t self-propel, double-check that the new cable is correctly routed and tensioned. The issue might also lie elsewhere, such as with the drive belt, the transmission, or the drive system’s engagement lever itself. Consulting your mower’s service manual or a professional is a good next step.