How to Trim Hedges with a Hedge Trimmer?
On this page (9 sections)
Trimming your hedges with a hedge trimmer is easier than you might think. New to this tool? Compare hedge trimmers for beginners before choosing a model. You just need to follow a few key steps for a clean, professional look. We found that proper technique ensures your hedges look their best and stay healthy. Always use sharp blades and maintain a consistent pace.
Getting your hedges in shape can make a big difference to your yard’s appearance. It’s not just about looks; regular trimming can help your hedges grow fuller and stronger. Many experts say that consistent maintenance prevents overgrown branches that can harm the plant. We found that understanding the right method is key to success.
- Always wear safety gear like gloves and eye protection.
- Start with a plan for the shape you want.
- Use smooth, sweeping motions with the trimmer.
- Keep the bottom of your hedge slightly wider than the top.
- Clean your trimmer after each use.
Let’s walk through exactly how to trim your hedges with a hedge trimmer step by step to get that perfect finish.
Getting Your Hedges Trimmed Like a Pro
Trimming your hedges doesn’t have to be a chore. With the right tools and a little know-how, you can achieve beautiful results. We found that understanding the basic techniques makes a big difference. Let’s get your hedges looking sharp!
Preparing for the Trim: Safety First!
Before you even think about starting the trimmer, it’s wise to prepare. Safety is always the first step. Many experts suggest wearing sturdy gloves and safety glasses (Mayo Clinic). This protects your hands from cuts and your eyes from flying debris. Thick work gloves will give you a better grip on the trimmer too.
Choosing the Right Hedge Trimmer
Do you have the right tool for the job? Hedge trimmers come in different types. Electric trimmers are great for smaller, well-maintained hedges. They are lighter and easier to handle. Gas-powered trimmers offer more power for larger or tougher jobs. Cordless electric trimmers provide a good balance of power and portability. Do you have the right tool for the job? Hedge trimmers come in different types.
We found that the weight of the trimmer is important. If you’re trimming for a long time, a lighter model will save your arms. Make sure the blades are sharp and clean before you begin. Dull blades can tear the leaves instead of cutting them cleanly. This can make your hedges look messy and invite disease.
Gathering Your Supplies
Beyond the trimmer, what else do you need? A sturdy ladder or step stool is essential for reaching higher areas. Make sure it’s stable on the ground. You’ll also want a tarp or drop cloth to catch the clippings. This makes cleanup much faster. A rake or leaf blower will help gather the fallen leaves. Don’t forget your safety gear!
Understanding Hedge Shapes and Angles
Ever wonder why some hedges look so neat and tidy? It’s all about the shape. Most hedges are trimmed into a simple shape, but there are best practices. We found that understanding the basic geometry helps tremendously.
The Essential “Topiary Taper”
This is the most important rule for healthy hedges. You need to trim the sides so they are slightly wider at the bottom than at the top. Think of an upside-down trapezoid or a very subtle “A” shape. Why is this so important? It allows sunlight to reach the lower branches. Without it, the bottom of your hedge can become sparse and bare. Many gardening resources recommend this technique for optimal growth (University Extension Services).
Visualizing the Taper
Imagine a perfectly flat-topped hedge. The top branches would block the sun from reaching the lower ones. Over time, those lower branches would weaken and die. The taper ensures that every part of the hedge gets its share of sunlight. It also helps snow slide off in winter, preventing branch breakage.
Achieving a Flat Top
For a flat-topped hedge, you’ll need a guide. A taut string line can be your best friend here. Stretch a string tightly between two stakes, or from one end of the hedge to the other at the desired height. Use this string as your guide. Keep the trimmer blades moving along the string. We found this trick yields very straight lines.
Cutting in Sections
Don’t try to do the whole top in one go. Trim small sections at a time. Step back frequently to check your work. This helps you catch any mistakes early. It’s easier to fix a small error than a large one. Patience is key to a beautifully manicured finish.
The Trimming Technique: Step-by-Step
Now for the actual trimming! The motion you use is important for a clean cut and efficiency. We found that a smooth, sweeping motion works best.
Getting Started: The Sides
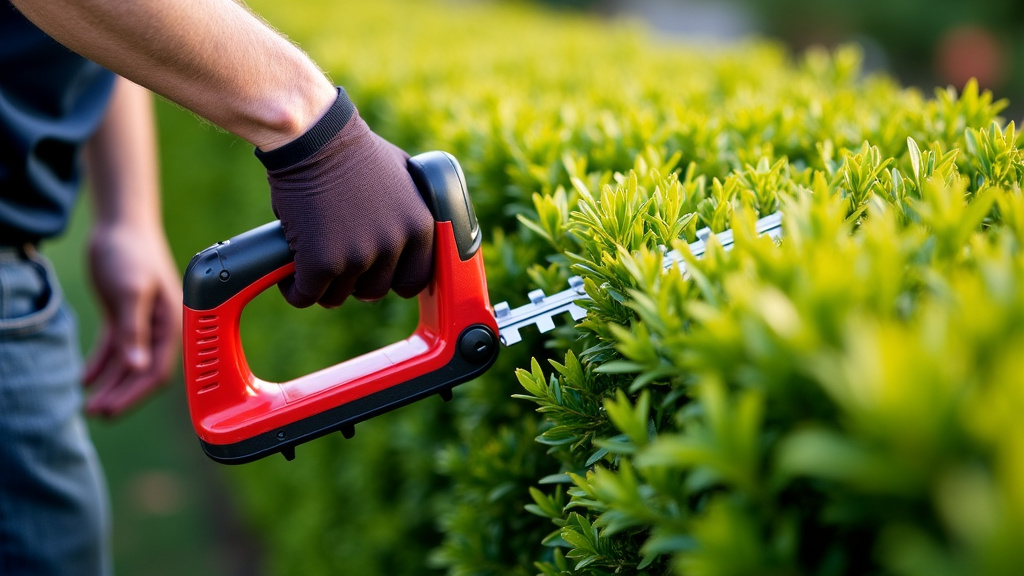
Begin with the sides of your hedge. Hold the trimmer with both hands. Start at one end of the hedge and move the trimmer in a smooth, sweeping motion, either up and down or side to side. Keep the blades moving constantly. Don’t let the trimmer just sit in one spot. You’re aiming to cut off only the tips of the branches. This is called “tipping” the hedge.
We found that it’s best to cut from the bottom up on the sides. This allows the clippings to fall away from the untrimmed part of the hedge. Keep the trimmer parallel to the hedge’s surface. This ensures an even cut. Many landscapers use a slight rocking motion with their wrists to guide the trimmer (Professional Landscaping Guides).
Using the String Guide on Sides
If you’re aiming for a very formal shape, you can use a string line on the sides too. Stretch a string from the top corner of one end to the bottom corner of the other. Use this as your guide for the taper. This might seem complicated, but it produces incredibly straight, clean lines.
Tackling the Top
Once the sides are done, move to the top. If you’re using a string line, now is the time to use it. Hold the trimmer so the blades are flat and horizontal. Move the trimmer back and forth along the top. Keep your body moving with the trimmer. Avoid reaching too far, as this can lead to an uneven cut.
We found that trimming the top a little higher than you think you need to is a good idea. The hedge will settle slightly after trimming. You can always go back and trim more if needed. It’s hard to put branches back once they’re cut!
Addressing Overhangs and Gaps
Step back and look at your hedge. Do you see any branches sticking out awkwardly? Use the trimmer to carefully snip them off. For smaller, stubborn branches, hand pruners might be more effective. If you notice bare spots or thin areas, don’t despair. Light trimming encourages new growth. Sometimes, you can even gently tie wayward branches to the main structure to guide them.
A Quick Checklist for Success
Before you pack up, run through this quick checklist. We found these steps help ensure a great finish and preserve your trimmer.
- Ensure blades are clean and sharp.
- Wear your safety glasses and gloves.
- Use a string line for straight top and sides if desired.
- Maintain the “topiary taper” (wider at the bottom).
- Use smooth, sweeping motions, not jerky stops and starts.
- Check your work from different angles often.
Post-Trimming Cleanup and Care
The trimming is done, but you’re not quite finished. Cleanup is an important step. Gather all the clippings using your tarp, rake, or leaf blower. Dispose of them properly according to your local guidelines. Many municipalities have specific rules for yard waste disposal.
Afterward, clean your hedge trimmer. Remove any sap or debris from the blades. A damp cloth usually does the trick. For electric models, unplug them first. For gas models, ensure the engine is off. We found that storing your trimmer in a dry place prolongs its life. Some people also apply a light lubricant to the blades for protection.
When to Trim Your Hedges
Timing is everything with hedges. Most flowering hedges should be trimmed right after they finish blooming. Trimming too early can remove the flowers! For evergreen hedges, late spring or early summer is often the best time. Avoid trimming late in the fall, as new growth may not have time to harden off before winter frost. Many experts suggest checking the specific needs of your hedge type (Arboriculture Associations).
We found that understanding your specific plant will help you determine the best trimming schedule. A consistent schedule keeps your hedges healthy and looking their best year after year.
Conclusion
You’ve learned how to trim your hedges like a pro! We covered the importance of safety gear and choosing the right trimmer. Remember that the ‘topiary taper’ keeps your hedges healthy by letting in sunlight. Smooth, consistent motions are key for a clean cut. Following these steps will give you beautifully manicured hedges. Now, step outside and give your hedges the attention they deserve!
Frequently Asked Questions
How often should I trim my hedges?
The frequency depends on your hedge type and how fast it grows. Generally, most hedges benefit from trimming once or twice a year. We found that consistent trimming prevents them from becoming overgrown and unmanageable.
What if my hedge trimmer blades are dull?
Dull blades can tear leaves, making your hedges look messy and prone to disease. If your blades are dull, it’s best to sharpen them or replace them before you start trimming. We found that sharp blades make a significant difference in cut quality.
Can I trim my hedges when they are wet?
It’s generally best to avoid trimming wet hedges. Wet branches can cause the blades to slip, and the clippings can clog the trimmer. This can make the cutting process more difficult and less precise. Always try to trim when your hedges are dry.
What’s the best way to get a perfectly straight top on my hedge?
Using a taut string line is your best bet for a straight top. Stretch a string tightly at your desired height along the length of the hedge. Use this as a guide for your trimmer. We found this trick ensures a clean, even line every time.
How do I deal with branches that are too thick for my hedge trimmer?
For branches that are too thick for your hedge trimmer, you’ll need to switch to a different tool. Hand pruners or loppers are perfect for thicker branches. We found that using the right tool for the job prevents damage to both the hedge and your equipment.