
How to Sharpen the Blades on a Push Mower?
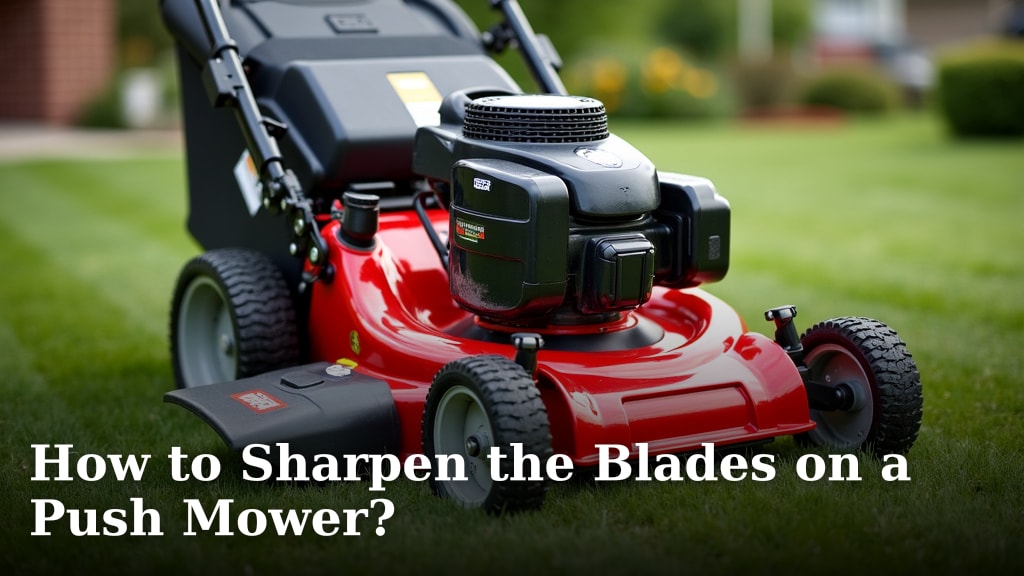
The easiest way to sharpen the blades on a push mower is by removing the blade and using a bench grinder or a metal file. This process helps your mower cut grass cleanly. You’ll get a healthier lawn and a much better-looking yard.
Dull mower blades tear grass instead of cutting it. This can lead to brown tips and make your lawn look unhealthy. Keeping your blades razor-sharp is a simple task that saves you time and effort in the long run. We found that sharp blades also make your mower run more efficiently.
- Remove the blade safely.
- Clean the blade thoroughly.
- Use a grinder or file to sharpen.
- Balance the blade carefully.
- Reinstall the blade correctly.
Ready to give your lawn mower blades the TLC they deserve? Let’s walk through exactly how to sharpen the blades on a push mower, step by step.
Prepping Your Mower Blades for a Sharpening Session
Before you even think about sharpening, you need to get your mower ready. This means putting safety first and properly removing the blade. Don’t worry, it’s not as hard as it sounds!
Safety First: Disconnecting Spark Plugs and Fuel
You never want your mower to accidentally start while you’re working on it. This is a very real danger. Always disconnect the spark plug wire before touching the blade. Just pull the rubber boot off the end of the spark plug. This ensures the engine can’t fire up.
If you have a gas mower, we also recommend draining the fuel tank or running the mower until it’s out of gas. Spilled fuel is a fire hazard. Plus, tilting a full gas mower can cause oil to leak into places it shouldn’t be (Consumer Reports). For electric mowers, simply unplug the power cord or remove the battery.
Always wear sturdy gloves when handling mower blades. They might be dull, but they can still cut you. Safety glasses are also a good idea. You never know when a piece of grime might fly off.
Tilting and Securing Your Mower Safely
To get to the blade, you’ll need to tilt your push mower. If it’s a gas mower, tilt it so the carburetor (the air filter side) faces upwards. This helps prevent oil and gas from leaking out. If you tilt it the wrong way, you could flood the engine or cause serious damage.
Place a sturdy block of wood or a jack stand under the mower deck to keep it stable. You don’t want it rocking or falling while you’re working. Some people even put bricks under the wheels. Just make sure it’s secure. A wobbly mower is a hazard.
Removing the Mower Blade
Now it’s time to take off the blade. You’ll need a wrench or a socket set. The bolt holding the blade in place is usually located in the center. It can be very tight, so don’t be afraid to use some muscle.
To keep the blade from spinning while you loosen the bolt, you can use a blade removal tool or a block of wood. Position the wood between the blade and the mower deck. Then, turn the bolt counter-clockwise to loosen it. Remember: “lefty loosey, righty tighty.”
Once the bolt is loose, carefully remove it and the blade. Pay attention to how the blade is oriented. Most blades have a specific way they attach. You’ll want to reinstall it the same way later. We recommend taking a photo with your phone for reference. It’s a simple trick that saves confusion.
Cleaning and Inspecting the Blade
Before sharpening, your blade needs a good cleaning. And while you’re at it, give it a thorough inspection. This helps you identify any damage that might make sharpening pointless.
Giving Your Blade a Good Scrub
Over time, grass clippings and dirt build up on your blade. This gunk can hide damage and make it harder to sharpen correctly. Use a stiff wire brush, a scraper, or even an old putty knife to scrape off all the debris.
You can also use a mixture of warm water and dish soap to really clean it. Just make sure to dry the blade completely afterward to prevent rust. Rust is the enemy of a sharp blade. We found that a good cleaning not only helps with sharpening but also reduces the weight imbalance caused by caked-on grime.
Checking for Damage and Wear
Once the blade is clean, it’s time for an inspection. Look closely at the cutting edges. Are there any big nicks, dents, or bends? A small nick can often be sharpened out, but major damage might mean you need a new blade. A severely bent blade can cause vibrations and even damage your mower’s engine (Briggs & Stratton).
Hold the blade up and look down its length. Is it straight? If it looks like a banana, it’s probably bent beyond repair. Also, check for any cracks, especially around the mounting hole. Cracks are a serious safety hazard and mean you need to replace the blade immediately. Never try to sharpen a cracked blade.
The Sharpening Process: File vs. Grinder
Now for the main event: sharpening! You have a couple of options here, each with its pros and cons. We’ll cover using a metal file and a bench grinder. Choose the method that feels most comfortable for you.
Sharpening with a Metal File
Using a metal file is a great option if you don’t have a power grinder or prefer a more hands-on approach. It gives you more control and is less likely to overheat the blade. You’ll need a large, flat mill file.
Secure the blade in a vice, making sure the cutting edge is facing up. Hold the file at the blade’s original angle. Most mower blades have an angle between 25 and 30 degrees. You’re trying to restore that factory angle, not create a new one.
Push the file across the cutting edge, always filing in one direction, away from your body. Apply firm, even pressure. Work slowly and deliberately. Count your strokes on each side. The goal is to remove metal evenly from both cutting edges. We found that 20-30 strokes per side often do the trick for a moderately dull blade.
Flip the blade over and repeat the process on the other cutting edge. You’ll know it’s getting sharp when you feel a small burr (a tiny, raised edge) on the opposite side of the blade. Once you have a burr, use the file to gently remove it. A truly sharp edge will feel keen to the touch (be careful!).
Using a Bench Grinder for Sharpening
A bench grinder can sharpen a blade much faster than a file. However, it requires more care. You need to be mindful of sparks and heat. Always wear heavy-duty gloves and safety glasses when using a grinder.
Mount the blade securely in a vice, or hold it firmly against the grinder’s tool rest. Be sure the blade is at the correct angle. Slowly bring the cutting edge into contact with the grinding wheel. Apply light, consistent pressure. Don’t press too hard, as this can overheat the blade.
Overheating can remove the temper from the steel, making the blade soft and unable to hold an edge. If the blade starts to change color (blue or purple), you’re overheating it. Dip it in a bucket of water to cool it down frequently. We recommend making several light passes rather than one heavy one.
Grind both cutting edges evenly. Remember that count-your-strokes tip from the filing section? That applies here too. Keep grinding until you have a sharp edge and a burr on the opposite side. Then, gently remove the burr with the grinder or a file. Again, the goal is to match the original angle.
The All-Important Blade Balancing Act
Sharpening your blade isn’t just about making it sharp; it’s about making it balanced. An unbalanced blade can cause your mower to vibrate excessively, leading to poor cutting quality and potential damage to your mower’s engine and bearings. This step is critical for mower health and your comfort.
Why Balancing Matters So Much
Imagine spinning a car tire that has too much weight on one side. It would wobble uncontrollably, right? The same principle applies to your mower blade. An unbalanced blade creates an uneven rotational force. This can cause:
- Excessive vibration: Uncomfortable for you, hard on the mower.
- Poor cut quality: Leaves your lawn looking ragged.
- Premature wear: Damages engine crankshafts and bearings over time. Ensuring your blades are sharp and balanced is a key step to make your lawn mower cut better and prevent damage.
- Safety risks: In extreme cases, an unbalanced blade can even detach.
We found that many people skip this step, but it’s arguably as important as the sharpening itself for the longevity of your mower.
How to Balance Your Mower Blade
There are special tools called blade balancers that make this easy. They usually look like a cone or a peg on a stand. You simply place the center hole of your sharpened blade onto the balancer.
If the blade stays perfectly horizontal, it’s balanced. If one side drops, that side is heavier. To fix this, you need to remove a small amount of metal from the underside of the heavier end. Use your file or grinder to gently shave off a bit of metal from the non-cutting edge side (the flat part) of the heavier end. Then, recheck it on the balancer.
Repeat this process of removing metal and rechecking until the blade hangs perfectly level. Be patient; it might take a few tries. It’s like a delicate dance, removing just enough metal to achieve perfect equilibrium. Your mower (and your lawn) will thank you for this extra effort.
Here’s a quick checklist to make sure your blade is ready for reinstallation:
- Blade is clean and free of debris.
- Cutting edges are sharp and free of major nicks.
- Original cutting angle has been maintained.
- Blade is perfectly balanced.
- No cracks or severe bends are present.
- You’ve double-checked all safety precautions.
Reattaching the Blade and Final Checks
You’re almost done! The last step is to correctly reattach the blade and ensure everything is secure. This is where attention to detail prevents future problems.
Properly Reinstalling the Blade
Remember that photo you took when you removed the blade? Now’s the time to refer to it. Make sure you’re installing the blade in the correct orientation. Usually, the curved part of the blade points up towards the mower deck. This curvature helps create the lift needed to cut grass effectively.
Place the blade back on the mower shaft, making sure the washers (if any) are in their correct positions. Then, thread the bolt back on and tighten it by hand. Finally, use your wrench or socket set to tighten the bolt securely. You’ll want it very snug, but don’t overtighten it as that can strip the threads.
A good rule of thumb is to tighten it until it feels very firm, then give it another quarter to half turn. We found that a torque wrench, if you have one, is ideal for ensuring proper tightness according to your mower’s manual. Your mower’s manual will have the exact torque specifications.
Final Safety Precautions and Testing
Before you even think about starting your mower, reconnect the spark plug wire. Push the rubber boot firmly back onto the spark plug. If you drained the fuel, refill the tank. For electric models, plug it back in or reinsert the battery.
Take one last look around the mower deck. Are there any tools left underneath? Is everything clear? Now, start your mower. Listen for any unusual vibrations or noises. A properly sharpened and balanced blade should result in a smoother, quieter operation than before.
If you notice excessive vibration, immediately shut off the mower and recheck your blade’s balance. Sometimes, even after balancing, a slightly off-center attachment can cause issues. Don’t operate a vibrating mower; it’s a sign something isn’t right and can cause serious damage (Occupational Safety and Health Administration).
Conclusion
You’ve now got all the knowledge to give your push mower blades a professional edge. By prioritizing safety, cleaning thoroughly, sharpening correctly with a file or grinder, and diligently balancing the blade, you’ll achieve a superior cut.
Remember, a sharp blade means a healthier, greener lawn and less strain on your mower’s engine. This simple maintenance task extends the life of your equipment and improves your yard’s appearance. So, grab your tools and get ready to enjoy the benefits of perfectly sharpened blades!
Frequently Asked Questions
How often should I sharpen my push mower blade?
We recommend sharpening your push mower blade at least once per mowing season, or every 25 hours of use. If you notice your grass tips are torn or brown after mowing, it’s definitely time for a sharpening. Mowing sandy soil or hitting obstacles can dull blades faster, requiring more frequent attention.
Can I sharpen a rusty mower blade?
You can sharpen a rusty mower blade, but you’ll need to remove the rust first. Use a wire brush or sandpaper to clean off all surface rust. If the rust has caused significant pitting or damage to the blade’s integrity, it’s safer to replace it than to sharpen it. Rust can weaken the metal, making it unsafe.
What kind of file should I use to sharpen my mower blade?
For sharpening mower blades by hand, a large, flat mill bastard file is ideal. These files are designed for general purpose metal removal and will effectively sharpen the blade’s edge. Make sure your file is clean and sharp itself for the best results, as a dull file won’t do much good.
Is it okay to sharpen only one side of the mower blade?
No, you should always sharpen both cutting edges of your mower blade equally. Sharpening only one side will create an imbalanced blade, leading to excessive vibrations, poor cutting performance, and potential damage to your mower. Even sharpening requires careful attention to balance.
How do I know if my mower blade is too dull to sharpen?
A mower blade might be too dull to sharpen if it has very deep nicks, large chunks missing, or significant bends that can’t be corrected. If you’ve sharpened it many times and there’s very little blade left, or if it shows signs of cracking, it’s time for a replacement. Safety always comes first.
