
How to Clean a Carburetor on a Lawn Mower?

The easiest way to clean a lawn mower carburetor is to disassemble it carefully, clean each component with a carburetor cleaner, and then reassemble. You’ll want to remove fuel and air filters first. This process helps your engine run smoothly again.
Is your lawn mower sputtering or refusing to start? A dirty carburetor is often the culprit, especially after sitting all winter. We found that fuel residue and debris can clog tiny passages, preventing proper fuel flow to your engine.
TL;DR:
- Gather your tools: wrench, screwdriver, carburetor cleaner.
- Drain old fuel from the tank.
- Carefully remove the carburetor from the engine.
- Disassemble and clean each part thoroughly.
- Reassemble and test your mower.
Let’s walk through exactly how to clean a carburetor on a lawn mower, step by step, so you can get back to a beautifully manicured yard!
Understanding Your Lawn Mower’s Carburetor
Before you dive into cleaning, let’s quickly understand what a carburetor does. Think of it as your engine’s chef. It precisely mixes air and fuel in the right proportions. This mixture is then sent to the engine for combustion, making your mower run. When this mixture is off, your mower struggles.
Over time, fuel residue, dirt, or even old gasoline can build up inside. This clogs the tiny passages in the carburetor, much like plaque in a pipe. The engine then receives too much or too little fuel, leading to poor performance or a complete refusal to start. Our research found that stale fuel is a common culprit for these clogs. Preventing stale fuel issues is a key part of properly storing your mower for winter.
Safety First: Preparing for the Clean-Up
Working with fuel and machinery requires caution. You want to protect yourself and your surroundings. Never skip these vital safety steps.
Gathering Your Essential Tools
Before you even think about touching the mower, get your tools ready. Having everything at hand saves time and frustration. We’ve found that a few simple items make this job much easier.
- Wrench Set: For various nuts and bolts.
- Screwdriver Set: Flathead and Phillips, different sizes.
- Carburetor Cleaner: A specialized aerosol spray.
- Safety Glasses: To protect your eyes from fuel or cleaner.
- Gloves: Chemical-resistant, to protect your skin.
- Clean Rags or Shop Towels: For wiping up spills.
- Small Container: For holding small parts.
- Compressed Air: Optional, for clearing passages.
- Old Toothbrush or Small Brush: For scrubbing.
Draining the Fuel and Disconnecting the Spark Plug
This step is non-negotiable for safety. You don’t want fuel spilling or the engine accidentally starting. It’s like turning off the water before fixing a leaky faucet.
- Drain the Fuel Tank: Use a siphoning pump or carefully tip the mower to drain old fuel into an approved container. Dispose of old fuel properly (check local regulations).
- Disconnect the Spark Plug: Pull the spark plug wire off the spark plug. This prevents the engine from accidentally sparking while you’re working. Many experts say this is a crucial safety measure (OSHA guidelines).
Removing the Carburetor from Your Mower
This part requires a little patience. Carburetors are usually held in place by a few bolts and connected to various hoses and linkages. Take your time and observe how things are connected.
Locating and Detaching Air Filter Components
The carburetor is usually located beneath the air filter housing. You’ll need to remove these parts first to get to it.
- Remove the Air Filter Cover: This often involves clips or screws.
- Take out the Air Filter Element: Note its orientation so you can put it back correctly.
- Remove the Air Filter Housing: This might be bolted to the engine. Pay attention to any hoses or tubes attached to it.
Disconnecting Fuel Lines and Linkages
Now you’re getting closer. You’ll see the fuel line and a few rods or wires that control the throttle and choke.
Before you start pulling, take a moment. Use your phone to snap a few pictures of how everything is connected. This visual reference will be a lifesaver when you reassemble. We found this simple trick prevents many headaches.
- Disconnect the Fuel Line: There’s usually a small clamp you can squeeze to release the hose. Be ready for a small amount of fuel to spill, even if you drained the tank.
- Unlink the Throttle and Choke Rods: These are usually small metal rods or wires that clip into place. Gently pry them off.
- Remove Carburetor Mounting Bolts: There are typically two bolts holding the carburetor to the engine. Once these are out, the carburetor should come free.
Carefully place the carburetor on a clean surface. You’ve done the hard part!
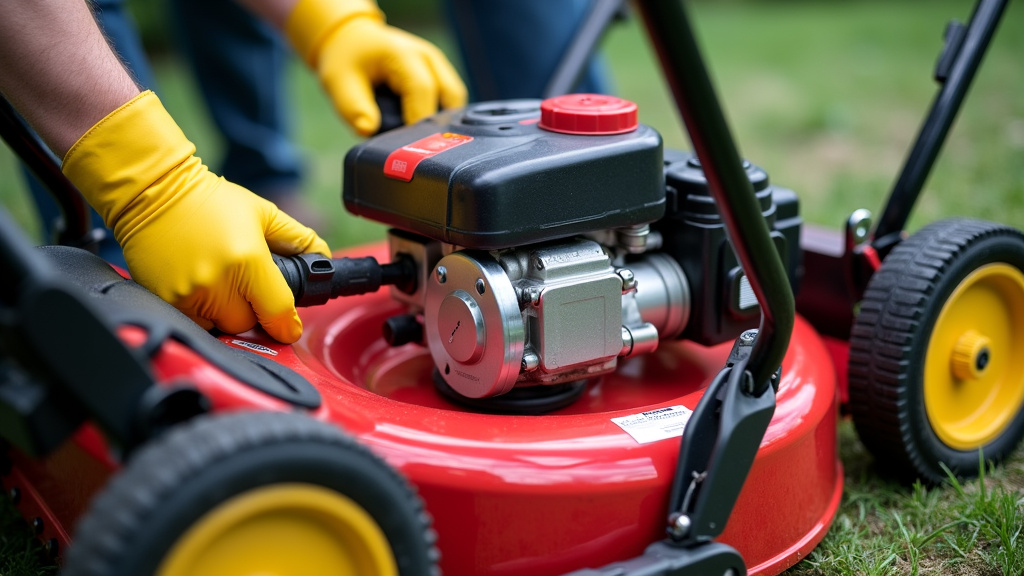
The Deep Clean: Disassembling and Cleaning the Carburetor
This is where the actual cleaning happens. Carburetors have many small parts. Organization is key here.
Disassembling the Carburetor Components
Lay out your parts in order. We recommend using a container with separate sections or even an old egg carton to keep track of tiny screws and springs.
- Remove the Float Bowl: This is usually at the bottom of the carburetor, held by a screw or clips. Expect some fuel to still be inside.
- Remove the Float and Pin: Inside the bowl, you’ll see a light, buoyant float. Gently push out the small pin that holds it in place, then remove the float and the needle valve attached to it.
- Remove the Main Jet and Emulsion Tube: These are often brass components, sometimes screwed in or pressed into the carburetor body. These are critical for fuel flow and often the source of clogs.
- Remove other small jets or screws: Depending on your carburetor model, there might be other tiny jets or idle mixture screws. If you remove an idle screw, count the number of turns it takes to remove it. This helps you reset it to the original position.
Remember those pictures you took earlier? They’ll come in handy if you get confused about what goes where.
Spraying Away the Grime
Now, let the carburetor cleaner do its job. This cleaner is designed to dissolve fuel varnish and sludge. Always wear your safety glasses and gloves!
- Spray all passages and orifices: Direct the spray into every hole, channel, and opening you can find on the carburetor body. Pay special attention to the main jet and emulsion tube holes.
- Clean all individual components: Spray the float bowl, the float itself, the needle valve, and especially the main jet and emulsion tube. Use your old toothbrush for any stubborn grime.
- Use compressed air (optional): If you have it, blow compressed air through the passages after spraying. This helps ensure all dissolved gunk is cleared out. You should be able to see light through all the tiny holes.
- Check for damage: While cleaning, inspect all parts for cracks, bends, or wear. If the needle valve tip looks worn, consider replacing it.
We found that patience is a virtue here. Don’t rush. Make sure every passage is clear.
Reassembly and Final Checks
Putting everything back together is essentially the reverse of disassembly. This is where your photos and organized parts really shine.
Putting the Carburetor Back Together
Work methodically, ensuring each part goes back exactly as it was. A misplaced gasket or a loose screw can cause issues.
- Install Jets and Emulsion Tube: Carefully screw or press these back into their places.
- Install the Needle Valve, Float, and Pin: Ensure the float moves freely.
- Attach the Float Bowl: Secure it with its screw or clips. Make sure the gasket is properly seated to prevent leaks.
- Reinstall the Carburetor onto the Engine: Align it and tighten the mounting bolts. Don’t overtighten; just snug.
- Reconnect Throttle and Choke Linkages: Refer to your photos! Ensure they move freely without binding.
- Reconnect the Fuel Line: Secure it with the clamp.
- Reinstall Air Filter Housing and Filter: Place the filter correctly and secure the housing and cover.
Checking for Leaks and Starting the Mower
You’re almost there! A few final checks before you fire it up.
Here’s a quick checklist:
- Is the spark plug wire reconnected?
- Are all fuel lines securely attached?
- Are all bolts and screws tightened?
- Is the air filter cover back on?
- Did you add fresh fuel to the tank?
Now, add some fresh gasoline to the fuel tank. Watch for any leaks around the carburetor. If you see any, tighten the fuel line clamps or float bowl screws. Pull the starter cord a few times. It might take a few more pulls than usual to get fuel flowing through the newly cleaned carburetor. If it starts but runs rough, let it warm up for a minute. Often, the engine needs a moment to adjust to the cleaner fuel system.
| Issue | Common Cause | Cleaning Focus |
|---|---|---|
| Mower won’t start | Completely clogged main jet or needle valve. | Main jet, needle valve, fuel passages. |
| Engine sputters or dies | Partially clogged jets, incorrect fuel/air mix. | All jets, emulsion tube, idle circuits. |
| Excessive smoke | Float level too high, too much fuel. | Needle valve, float, float bowl. |
| Engine surging or hunting | Idle circuit or small air bleed passages blocked. | Idle jet, small air passages, governor linkage. |
If your mower still struggles, you might have missed a tiny passage, or a component might be too worn to function properly. Sometimes, a full carburetor rebuild kit (which includes new gaskets and jets) is the next step.
Conclusion
You’ve now got the knowledge to tackle a common lawn mower problem: a dirty carburetor. By carefully disassembling, cleaning each part, and reassembling, you can often bring your mower back to life. Remember, patience and attention to detail are your best friends here. Don’t be afraid to take pictures along the way!
With a clean carburetor, your engine will run smoother and more efficiently. So, gather your tools, follow these steps, and get ready to enjoy a perfectly mowed lawn. You’ve got this!
Frequently Asked Questions
How often should I clean my lawn mower carburetor?
We typically find that cleaning is needed when performance issues arise, like sputtering or difficulty starting. If you store your mower for long periods with fuel in the tank, cleaning every one to two years might be a good preventative measure.
Can I clean a carburetor without removing it from the engine?
While some fuel system cleaners claim to clean without removal, our research shows a thorough cleaning almost always requires disassembly. Tiny passages often need direct spraying and sometimes gentle brushing to clear stubborn clogs effectively.
What kind of carburetor cleaner should I use?
You should use a specialized aerosol carburetor cleaner, which is formulated to dissolve fuel varnish and carbon deposits. Always choose a product safe for small engines and wear proper protective gear when using it.
What if my lawn mower still isn’t running right after cleaning the carburetor?
If issues persist, you might have a deeper problem. We found common next steps include checking the spark plug, air filter, and fuel filter. Sometimes, a full carburetor rebuild kit or even professional service is needed if components are worn or damaged. If your mower still won’t start after cleaning the carburetor, our guide can help you troubleshoot other reasons preventing your lawn mower from starting.
Is it better to repair or replace a carburetor?
For simple clogs, cleaning is often enough. If the carburetor body is cracked, or multiple internal parts are severely corroded, replacement might be more cost-effective. We recommend weighing the cost of a new carburetor against the time and parts needed for a repair.
