
How To Put Bagger On Lawn Mower?
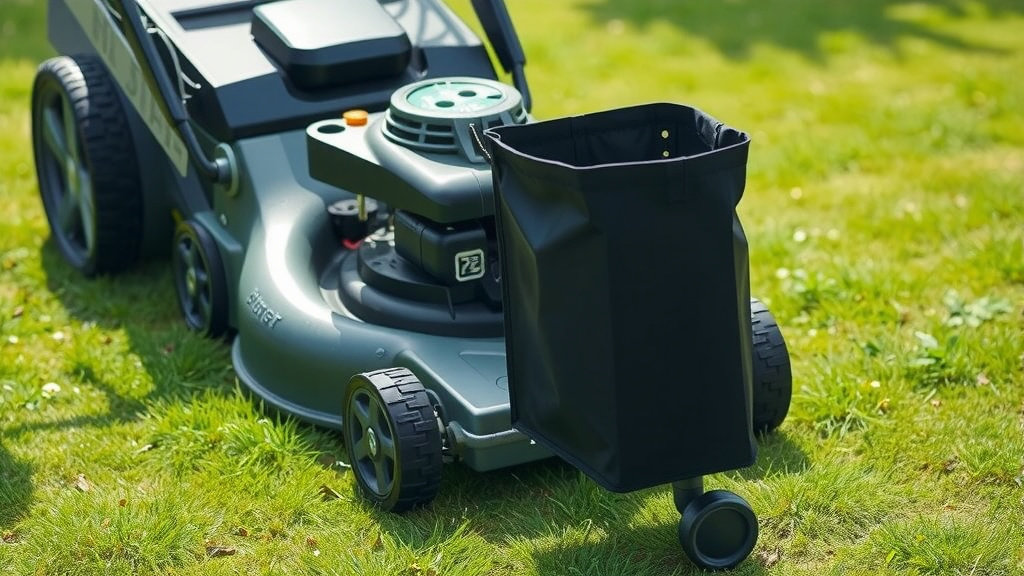
To put a bagger on your lawn mower, first ensure your mower is off and cool. Then, remove the side discharge chute cover and securely attach the bagger’s discharge tube, often twisting it into place.
Next, assemble the bagger frame according to your mower’s specific instructions, typically hooking it onto the mower’s rear or handle, and finally, slide the collection bags onto the frame.
- The best way to attach a lawn mower bagger is by ensuring your mower is off and cool for safety.
- You’ll typically start by removing the side discharge chute cover.
- Then, connect the bagger’s discharge tube firmly where the chute was.
- After that, assemble and mount the bagger frame onto your mower.
- Finally, place the collection bags onto the frame for a secure setup.
Hey there, fellow lawn enthusiast! Ever looked at your neatly mowed lawn, only to see clippings scattered everywhere, making it look a bit… messy? You’re not alone. Many of us want that clean, crisp finish, and that’s where a lawn mower bagger becomes your best friend. It’s a great tool for keeping your yard tidy and can even help reduce thatch buildup. But how exactly do you get this handy attachment onto your mower?
Don’t worry, it’s not a complicated puzzle. Think of it like putting together a piece of furniture: a few steps, some key parts, and a bit of patience. We’ve got your back with a clear, step-by-step guide that will have you bagging clippings in no time. Let’s get that lawn looking its absolute best!
How To Put Bagger On Lawn Mower?
Putting a bagger on your lawn mower involves connecting a collection system to your mower’s discharge opening, usually at the rear or side. This setup channels grass clippings directly into collection bags, keeping your lawn tidy. It’s a straightforward process when you know the steps.
Why Consider a Bagger for Your Lawn?
You might be wondering, “Is a bagger truly necessary for my lawn care routine?” Many experts suggest using a bagger for several reasons. It helps achieve a cleaner appearance, especially when you’re aiming for that perfectly manicured look for a special event or just because you love a pristine yard.
Beyond aesthetics, bagging can be beneficial for lawn health. When dealing with excessive leaves or tall, wet grass, bagging prevents thick layers of clippings from smothering your lawn. This reduces the risk of fungal diseases and thatch buildup, which can block water and nutrients from reaching the soil (University of Illinois Extension).
We found that bagging also removes weed seeds, stopping them from spreading across your yard. It’s like hitting two birds with one stone: tidiness and health!
Before You Begin: Safety First!
Before you even think about touching that bagger, safety should be your top priority. You wouldn’t want to change a tire on a moving car, right? The same principle applies here. Always make sure your mower is completely safe to work on.
Here’s a quick checklist to keep you safe:
- Engine Off: Absolutely no exceptions here. Turn off the engine.
- Cool Down: Let the mower cool down for a bit if it’s been running. Hot parts can burn you.
- Spark Plug Wire: Disconnect the spark plug wire. This prevents any accidental starts, giving you peace of mind.
- Level Surface: Work on a flat, stable surface. This prevents the mower from rolling or tipping.
- Wear Gloves: Protect your hands from sharp edges or grease.
Gather Your Tools
Good news! You won’t need a huge toolbox for this job. Most bagger installations are quite simple. Often, the bagger kit itself comes with all the necessary hardware. However, it’s always smart to have a few basic tools nearby, just in case. We found that a socket wrench or adjustable wrench can be handy for tightening bolts. Sometimes a screwdriver might be useful too. Think of it like a minor assembly task, where simple tools get the job done efficiently.
Understanding Your Bagger System
Before you start attaching anything, take a moment to understand what you’re working with. Bagger systems aren’t one-size-fits-all. They vary depending on your mower’s make and model. Many experts recommend reading your mower’s manual and the bagger’s instructions before you begin. These guides often have model-specific diagrams and tips that will save you time and frustration.
We found that knowing whether your mower is designed for a rear-mount or side-mount bagger can make a big difference. This knowledge helps you visualize the process and ensures you’re putting the right parts in the right places.
Single vs. Double Bagger vs. Triple Bagger
You’ll often see different sizes of bagger systems. What’s the difference? It’s all about capacity! A single bagger is typically for smaller yards or walk-behind mowers, offering compact grass collection. A double bagger provides more capacity, meaning fewer stops to empty. For larger lawns or commercial use, you might even find a triple bagger, which truly maximizes your mowing time by holding a substantial amount of clippings. We found that choosing the right size depends on your yard’s acreage and how often you want to stop and empty the bags. More bags mean more mowing, less emptying!
Step-by-Step Bagger Installation Guide
Ready to get your hands a little dirty? Let’s walk through the steps to successfully attach your lawn mower bagger. Take your time, follow these instructions, and you’ll be set.
Step 1: Prepare Your Mower
Remember that safety checklist? This is where it comes into play. Make sure your mower is turned off, cooled down, and the spark plug wire is disconnected. If your mower has a side discharge chute, you’ll usually need to lift or remove its cover. This creates the opening where your bagger’s chute will connect.
Step 2: Attach the Discharge Chute Adapter
This is where the magic happens! The bagger system will come with a long tube or chute. This piece needs to connect from your mower’s discharge opening to the bagger collection system. For side-discharge mowers, you’ll typically slide the adapter over the discharge port and secure it. It often has clips, hooks, or a twist-lock mechanism. Ensure it’s a snug and secure fit; you don’t want grass clippings flying out!
Step 3: Mount the Bagger Frame
Now, let’s get that frame on! The bagger frame is what holds your collection bags. Depending on your mower model, it will either attach to the rear of your riding mower or hook onto the handlebars of a walk-behind mower. Follow your manual’s specific instructions. You’ll likely use pins, bolts, or quick-release clips to secure it. Many experts stress the importance of ensuring the frame is stable and doesn’t wobble, as this supports the weight of the clippings.
Step 4: Secure the Collection Bags
With the frame firmly in place, it’s time for the bags. Most baggers come with fabric bags that have a stiff opening. You’ll typically slide these openings onto the frame’s hooks or rails. Make sure each bag is fully seated and secure. If they’re not attached properly, clippings can escape, or the bags might even fall off during use. Give them a gentle tug to confirm they’re locked in.
Step 5: Check All Connections
Almost done! Before you fire up the engine, do a quick visual check of everything. Is the chute adapter firmly in place? Is the frame stable? Are the bags securely attached? Are there any gaps where clippings could escape? A final once-over ensures you’ve missed nothing and your bagger is ready to perform. It’s like a pilot’s pre-flight check, ensuring everything is A-OK for smooth operation!
Common Bagger Problems & Solutions
Even with the best installation, you might run into a snag or two. Don’t fret! These are often simple fixes. We found that most issues stem from a few common areas.
Clogging Issues
Ah, the dreaded clog! This usually happens when grass is too long, too wet, or you’re mowing too fast. Here’s a quick guide:
| Problem | Solution |
|---|---|
| Wet or long grass | Mow when grass is dry. Raise cutting height for very long grass. |
| Mowing too fast | Slow down your mowing pace to allow grass to clear. |
| Blocked chute/tube | Turn off mower, disconnect spark plug. Clear blockage by hand (wear gloves!). |
| Full bags | Empty bags more frequently. Don’t let them overflow. |
Bag Not Filling Evenly
Does one bag look stuffed while another is almost empty? This often points to an airflow problem or a partial blockage. Check your discharge tube for any debris or buildup. Sometimes, the bagger frame or bags themselves might not be positioned perfectly, obstructing airflow. We found that ensuring the connection between the chute and the bagger frame is sealed helps create even suction, allowing all bags to fill properly.
Maintenance Tips for Your Bagger
Just like any tool, your bagger needs a little love to keep working efficiently. After all, it does a lot of dirty work! Many guidelines point to regular cleaning as a good first step (manufacturer manuals). After each use, empty the bags and shake out any remaining debris. Periodically, you might want to hose down the plastic chutes and the inside of the bags to prevent caked-on grass, which can reduce airflow and lead to clogging.
Research often connects proper storage with longer product life (Lawn Care Industry reviews). Store your bagger in a dry place to prevent rust on metal parts and mildew on fabric bags. Periodically check for wear and tear, like tears in the bags or cracks in the plastic chute. Catching these issues early can save you from bigger problems later.
Conclusion
Well, there you have it! Attaching a bagger to your lawn mower might seem like a daunting task at first glance, but with the right guidance, it’s quite manageable. You’ve now learned how to prepare your mower, connect the discharge chute, mount the frame, and secure those all-important collection bags. Remember, safety always comes first, so taking those few extra steps before you start is genuinely worthwhile.
A bagger truly transforms your lawn care routine, giving you that clean, crisp finish you desire while also helping with lawn health. So go ahead, put on your gloves, follow these steps, and enjoy a tidier, healthier lawn. You’ve got this!
Can I use any bagger with any lawn mower?
No, bagger systems are typically designed to be specific to certain lawn mower brands and models. They need to fit the discharge opening and mounting points correctly. Always check your mower’s manual or the bagger’s compatibility chart before purchasing to ensure a proper fit.
How do I know if my mower is ready for a bagger?
Most walk-behind mowers and riding mowers are “bagger ready,” meaning they have the necessary discharge port. Look for mounting points on the rear or side of your mower. Your mower’s owner’s manual will confirm if a bagger attachment is available and which one to choose.
What should I do if my bagger isn’t collecting grass well?
If your bagger isn’t collecting grass efficiently, first check for clogs in the discharge chute or bags. Ensure the bags aren’t already full. Also, verify that the chute is securely attached and that you’re not mowing grass that is too wet or excessively long, as these conditions can hinder proper suction and collection.
Is it better to bag or mulch grass clippings?
Both bagging and mulching have benefits. Bagging provides a very clean lawn and removes thatch buildup or weed seeds. Mulching, however, returns valuable nutrients to the soil, acting as a natural fertilizer. The best choice often depends on your lawn’s current condition, grass length, and personal preference for aesthetics versus nutrient return.
How often should I empty my lawn mower bagger?
You should empty your lawn mower bagger frequently, ideally before the bags are completely full. Overfilling can reduce collection efficiency, cause clogging, and put unnecessary strain on your mower. Emptying when the bags are about two-thirds full is a good practice to maintain optimal performance.
