
How To Install Bag On Lawn Mower?
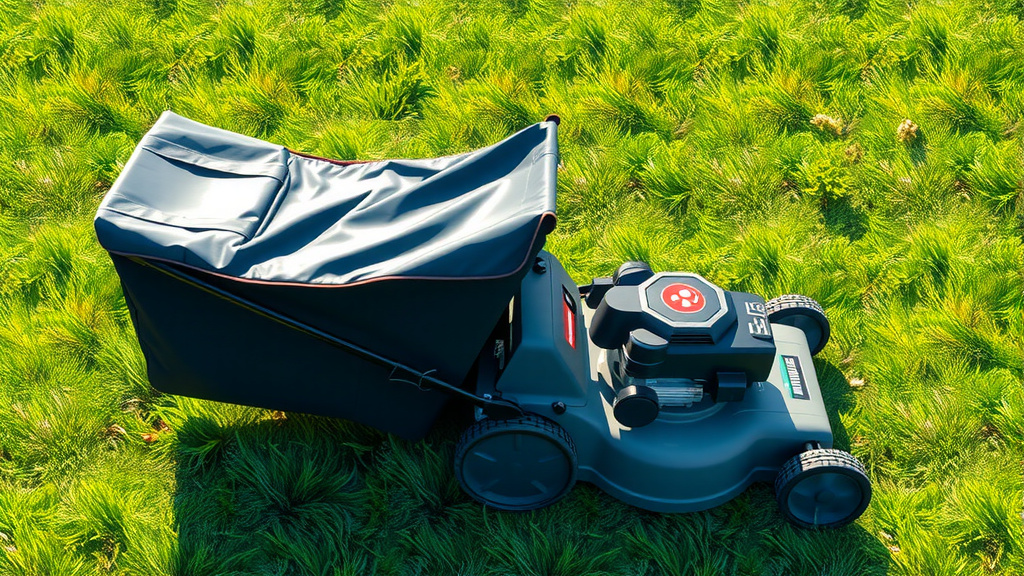
To install a bag on a lawn mower, first ensure the engine is off and cool. Then, locate the bag’s mounting points, which are typically hooks or slots on the mower’s deck or handle frame, and securely attach the bag until it clicks or locks into place.
Properly installing your lawn mower bag keeps your yard tidy, prevents clippings from scattering, and often improves mower efficiency by maintaining a clear cutting deck for future mowing sessions.
- Proper bag installation is vital for a clean and efficient lawn mowing experience.
- Always prioritize safety first by turning off your mower before starting.
- Identify your mower’s specific bag attachment style, as designs can vary widely by model.
- Connecting the bag usually involves aligning it with hooks or grooves until you hear a secure click.
- Regularly check the bag’s condition and clear any clogs to ensure optimal performance.
You’ve decided it’s time to tame that unruly lawn, and you want to collect those grass clippings. Great choice! Using a grass bag makes cleanup much simpler. But how do you actually get that bag onto your mower without a struggle? Let’s walk through it together. It’s often simpler than you might imagine, and we’re here to guide you to a perfectly attached bag.
How To Install Bag On Lawn Mower?
To install a bag on a lawn mower, ensure safety first by turning off the engine. Then, align the bag’s frame with your mower’s discharge chute opening or attachment points until it locks securely into place.
Safety First: Your Most Important Step
Before you even think about attaching anything to your lawn mower, safety is absolutely paramount. We can’t stress this enough. Always turn off the engine and remove the spark plug wire. This prevents any accidental starts, protecting your hands and fingers from potential injury (OSHA guidelines frequently emphasize power equipment safety). Think of it like taking the keys out of your car before checking under the hood.
Allow the mower to cool down for a few minutes if it’s been running. Moving parts might still be hot. Taking these few moments ensures your hands are safe from any burns or unexpected movements. It’s a small pause for a big gain in safety.
Understanding Your Mower’s Bagging System
Lawn mowers come in various designs, and their bagging systems can differ quite a bit. Yours might have a simple clip-on design, or it could involve a more intricate frame. Many experts say that knowing your mower model helps. Some common types include rear-bagging mowers and side-bagging mowers. Each has slightly different attachment points, so a quick look at your owner’s manual is always a smart move (manufacturers’ instructions are gold).
Take a moment to inspect your mower. Can you see where the old bag was, or where the grass clippings usually exit? Identifying the discharge chute and any existing hooks or grooves will give you a clear roadmap for your new bag. This visual check is often the fastest way to understand your specific setup.
Gathering Your Tools (If Any!)
For most bag installations, you won’t need an entire toolbox. Often, your hands are the only tools required. However, some older models or more complex systems might involve a screwdriver or wrench. It’s a good idea to have these handy just in case. We found that a clean rag can also be useful for wiping down the discharge chute, ensuring a clear connection point for the bag.
Make sure your new grass bag is fully assembled if it came in pieces. Sometimes, the bag fabric needs to be slid over a metal frame. Check the packaging for any assembly instructions before you proceed with attaching it to the mower. A little prep work here can save you headaches later.
Step-by-Step Guide: Attaching the Bag
Ready to get this bag on? Let’s go through the steps methodically. It’s often a straightforward process once you know where everything fits. Don’t rush it; a secure fit means a better mowing experience.
Clearing the Discharge Chute
First, give the discharge chute a quick once-over. Remove any lingering grass clippings, leaves, or debris. A clean chute ensures the bag can seat properly and allows for an efficient flow of grass into the bag. Think of it like clearing a path for a smooth journey. We’ve seen that a clogged chute can lead to poor bagging performance, so this quick clean is worth it.
Lifting the Discharge Cover
Most mowers have a spring-loaded discharge cover or flap. Gently lift this cover. This action exposes the opening where the grass clippings will exit and where your bag needs to connect. Be mindful of the spring tension; it might snap back if you let go suddenly. Holding it open gives you a clear view of the attachment area.
Aligning the Bag’s Frame
Now, take your grass bag. You’ll notice it has a frame, usually with a plastic or metal collar designed to fit your mower. Align this collar with the opening of the discharge chute. Many experts suggest looking for notches or grooves on both the bag and the mower. These are your guides. They help ensure you’re putting the bag on the correct way around and in the right position.
Securing the Bag in Place
With the bag aligned, gently push or slide it into position. You might feel a slight resistance, but it should slide on without much force. Many mowers have hooks, pins, or clips on the mower body that the bag’s frame will latch onto. Listen for a distinct “click” or feel a solid engagement. This sound or sensation indicates the bag is securely fastened. Research often connects proper engagement with preventing bag detachment during operation (Consumer Reports testing).
Lowering the Discharge Cover (If Applicable)
For some mowers, the discharge cover will rest on top of the bag’s opening, helping to seal the system. Gently lower the cover, ensuring it sits flush against the bag. This creates a good seal, preventing grass clippings from escaping around the edges. A proper seal means a cleaner mowing path for you.
Troubleshooting Common Bag Installation Issues
Sometimes, things don’t go perfectly on the first try. That’s okay! Let’s look at some common snags and how to fix them. You’re not alone if it takes a moment to get it right. We’ve all been there, wondering if the bag is even meant for our mower. Often, it’s just a minor adjustment needed.
| Problem | Possible Cause | Solution |
|---|---|---|
| Bag won’t fit | Incorrect bag model or obstruction | Verify bag matches mower model. Clear chute of debris. |
| Bag feels loose | Not fully engaged or worn clips | Push firmly until it clicks. Check clips for damage. |
| Grass escapes from sides | Improper seal or cover not down | Ensure bag is flush and discharge cover is fully lowered. |
| Bag quickly clogs | Wet grass or bag too full | Mow when grass is dry. Empty bag more frequently. |
Verifying the Fit: A Quick Checklist
Once you think the bag is on, it’s a good idea to do a quick check. This ensures everything is secure before you start the mower. Think of it as a pre-flight check for your lawn care mission. A quick visual inspection can prevent minor annoyances during mowing.
- Is the bag firmly attached to the mower? Give it a gentle tug.
- Are there any obvious gaps where grass could escape? Look for a snug seal.
- Does the discharge cover sit correctly on the bag (if applicable)? It should feel natural.
- Can you easily remove it, or does it feel properly locked? It should require a deliberate action to detach.
- Is the bag itself in good condition, without rips or tears? Check for any damage that might let clippings out.
Why a Properly Installed Bag Matters
A well-installed grass bag is more than just convenient; it’s a performance booster. When the bag is on correctly, it ensures all those clippings go where they belong, keeping your lawn clean. It also prevents clogs in the discharge chute, which can bog down your mower and reduce its efficiency. We found that a secure bag contributes to a more consistent cut. Many guidelines point to proper maintenance, including bag installation, as a way to extend the life of your mower (Briggs & Stratton maintenance tips). It really does make a difference in your mowing outcome.
Conclusion
Installing a bag on your lawn mower doesn’t have to be a confusing task. By prioritizing safety, understanding your mower’s specific design, and following these simple steps, you can get it attached securely in no time. A properly installed bag ensures a cleaner yard, a more efficient mowing process, and a much happier you. Now go forth and conquer those clippings with confidence and ease. Your lawn will thank you for the neat and tidy finish!
How do I know if my lawn mower bag is full?
You’ll usually notice the mower struggling more or leaving a trail of clippings behind it. Some modern mowers even have an indicator, but typically, a visible bulge in the bag and a decrease in bagging efficiency are the best signs it’s time to empty.
Can I use any grass bag on my lawn mower?
No, not just any bag will fit. Grass bags are designed to be specific to certain mower models or brands. Always check your mower’s model number and purchase a bag that is compatible to ensure a proper and secure fit.
What if my mower doesn’t have a bagging option?
If your mower doesn’t have a bagging option, it’s likely designed for mulching or side discharge. You might be able to purchase an aftermarket bagging kit for some models, but always check with the manufacturer first. Otherwise, you can use a rake to collect clippings.
How often should I empty the grass bag?
Empty your grass bag whenever it’s about two-thirds to three-quarters full. This prevents the mower from becoming bogged down and ensures efficient grass collection. For larger lawns, you might need to empty it several times during a single mowing session.
My new bag came unassembled. What should I do?
If your new bag came unassembled, it usually means you need to stretch the fabric bag over a metal frame. Refer to the instructions provided with the bag. They will guide you through the process of assembling the frame and attaching the fabric, which is usually quite simple.
