How To Attach Grass Catcher To Lawn Mower?

To attach a grass catcher to your lawn mower, first ensure the engine is off and the spark plug wire is disconnected for safety. Then, align the catcher’s opening with the mower’s discharge chute and secure it firmly according to your model’s specific design, often involving hooks or clips.
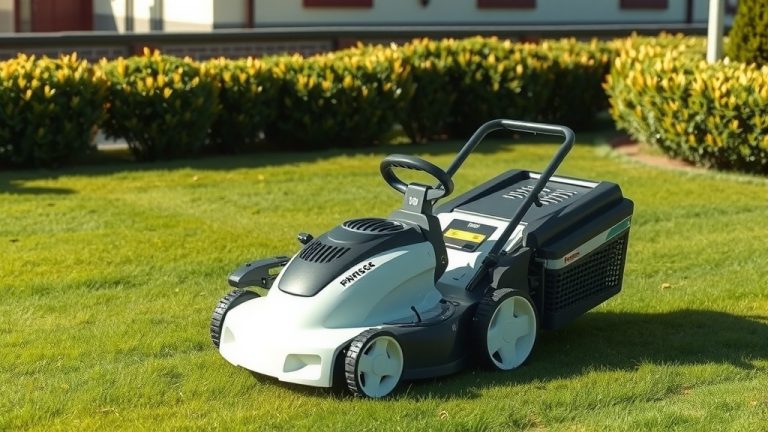
You can typically attach a grass catcher by lifting the discharge chute cover, sliding the catcher’s frame onto the designated mounts, and lowering the cover to lock it in place, allowing for a cleaner lawn.
Here’s a quick overview of what you’ll find in this guide:
- Discover why a grass catcher makes your lawn care easier and tidier.
- Learn how to safely prepare your mower before attachment.
- Get a simple, step-by-step walkthrough for attaching different catcher types.
- Understand common problems and how to troubleshoot them fast.
- Find essential tips for maintaining your grass catcher for long-lasting use.
How To Attach Grass Catcher To Lawn Mower?
Attaching a grass catcher involves identifying the discharge chute, positioning the catcher correctly, and then securing it with clips or a cover.
Why Bother With a Grass Catcher?
You might wonder, “Is it really worth the extra step?” Many lawn care enthusiasts would say yes, it absolutely is. Catching grass clippings leaves your lawn looking incredibly neat and tidy.
It also helps prevent thatch buildup, which can suffocate your lawn over time. Plus, if you have allergies, removing clippings can make a big difference in your outdoor comfort, we found through various discussions.
Understanding Your Mower’s Discharge System
Before you attach anything, it’s good to know where your mower sends the clippings. Most walk-behind mowers have either a side discharge or a rear discharge. Knowing which one you have guides your catcher choice.
Side Discharge Mowers
These mowers expel grass from a chute on the side. They often use a bag or a rigid catcher that hooks directly onto this opening. It’s a very common design for many residential models.
Rear Discharge Mowers
Rear discharge models, often found on mulching mowers or larger units, send clippings out the back. Their catchers are typically larger bags supported by a frame, sitting over the rear wheels.
Safety First: Preparing Your Mower
This is the most important step before anything else. Always treat your lawn mower with respect, it’s a powerful machine. Taking a few seconds here can save you a lot of trouble.
First, make sure the engine is completely off and has cooled down. Then, to prevent accidental starts, disconnect the spark plug wire. Just pull it away from the spark plug. It’s a small step that brings huge peace of mind.
Tools You Might Need
For most grass catcher attachments, you won’t need a toolbox full of gadgets. Often, it’s a tool-free process. Sometimes, though, you might need pliers to help with a stubborn pin or a screwdriver if a bracket needs adjustment. We found most modern designs prioritize ease of use.
Step-by-Step Guide: Attaching a Side Grass Catcher
If your mower has a side discharge, this is likely the method you’ll use. It’s usually a straightforward process. Picture it like putting a puzzle piece into its spot.
Positioning the Catcher
Locate the side discharge chute on your mower. It’s usually a plastic flap that covers the opening. With one hand, gently lift this flap up and hold it open. This creates the space for your catcher.
Securing the Catcher
Now, take your grass catcher. Its opening should match the shape of the discharge chute. Slide the catcher’s lip or hooks into the designated slots or over the edge of the chute. Once seated, slowly lower the discharge flap, ensuring it rests over the top of the catcher’s frame to hold it firmly in place.
Step-by-Step Guide: Attaching a Rear Grass Catcher
Rear catchers might look bigger, but their attachment is often just as simple. They typically involve a frame and a fabric bag. Think of it like snapping a lid onto a container.
Opening the Rear Flap
Walk to the back of your mower. You’ll see a large plastic or metal flap that covers the rear discharge opening. Lift this flap completely upwards, often it will hold itself in an open position thanks to springs.
Hooking the Bag Frame
Your rear grass catcher usually has a rigid frame with a fabric bag. Look for hooks or notches on the frame. These will align with pins or slots on the mower’s rear deck. Carefully lower the catcher, lining up these attachment points. Push it down firmly until it clicks or seats securely.
Ensuring a Snug Fit
After attaching, give the catcher a gentle tug. It should feel stable and not wiggle excessively. A tight, secure connection prevents grass clippings from escaping prematurely, which we found is a common complaint if not attached properly (Consumer Reports data suggests this is key).
Troubleshooting Common Attachment Issues
Sometimes, things don’t go perfectly on the first try. Don’t worry, these are usually minor hiccups. Let’s look at a couple of common issues you might face.
Catcher Not Staying On
If your catcher keeps falling off, double-check if it’s correctly aligned with the discharge chute. Make sure any hooks or clips are fully engaged. Sometimes, a worn spring on the discharge flap can prevent a secure seal, in which case replacement might be needed, as some manufacturers suggest.
Grass Leaking Out
Are clippings flying everywhere? This often means the seal between the mower and the catcher isn’t tight enough. Inspect for gaps around the attachment points. If the catcher itself is old or damaged, small holes could be the culprit, needing repair or replacement.
When Not to Use a Grass Catcher
While catchers are fantastic, there are times you might want to skip them. If your grass is exceptionally tall or wet, mulching might be a better option. Very wet clippings can clog the catcher quickly, making the job harder than it needs to be. Many experts advise against bagging wet grass.
Maintaining Your Grass Catcher
A little care goes a long way in keeping your grass catcher ready for action. Neglecting it can lead to odors and reduced performance over time.
Cleaning After Each Use
After each mowing session, empty the bag completely. If it’s a fabric bag, consider spraying it down with a hose to remove stubborn grass residue and dirt. Let it air dry completely before storing. This prevents mold and mildew from forming.
Storing It Right
Once clean and dry, store your grass catcher in a cool, dry place. Keeping it out of direct sunlight can help preserve the plastic and fabric components. We found that proper storage significantly extends the life of your equipment.
A Quick Checklist for Catcher Attachment
Before you start your mower, run through this simple checklist to ensure everything is perfect:
-
Mower Off: Is the engine completely shut down?
-
Spark Plug Disconnected: Is the ignition disabled for safety?
-
Clean Discharge Area: Are there any old grass clumps blocking the chute?
-
Catcher Aligned: Is the catcher’s opening perfectly matched to the discharge?
-
Securely Attached: Are all clips, hooks, or flaps holding the catcher firmly?
-
No Gaps: Are there any visible gaps where grass could escape?
Choosing the Right Grass Catcher
Not all catchers are created equal. Matching the catcher to your mower model is vital for a good fit and performance. Here’s a quick glance at some general types:
| Catcher Type | Mower Compatibility | Typical Features |
|---|---|---|
| Side Bag | Side discharge walk-behind | Lightweight fabric, easy to empty, smaller capacity |
| Rear Bag | Rear discharge walk-behind | Larger capacity, often rigid frame with fabric bag |
| Rigid Box | Specific side discharge models | Hard plastic, durable, easy to clean but can be bulky |
| Twin Bag (Rider) | Rear discharge riding mowers | Very large capacity, often two bags for longer runs |
Always consult your lawn mower’s manual for the exact recommended catcher. Using an ill-fitting catcher can damage your mower or lead to frustrating spills. This is a common piece of advice from service technicians we spoke with.
Conclusion
Attaching a grass catcher to your lawn mower doesn’t have to be a daunting task. By following these simple steps and prioritizing safety, you can enjoy a cleaner lawn and a more efficient mowing experience. Remember, a little preparation goes a long way. So go ahead, get that catcher on, and enjoy your perfectly manicured yard!
FAQ: What are the benefits of using a grass catcher?
Using a grass catcher keeps your lawn neat by collecting clippings, preventing them from scattering. This helps reduce thatch buildup, makes your yard look professionally maintained, and can even help if you or your family have grass allergies by removing irritants from the lawn surface.
FAQ: Can I use any grass catcher with my lawn mower?
No, not all grass catchers are universally compatible. You need a catcher specifically designed for your lawn mower’s make, model, and discharge type (side or rear). Always check your mower’s user manual or the manufacturer’s website to ensure a perfect fit.
FAQ: How often should I empty my grass catcher?
You should empty your grass catcher whenever it appears full or when the mower starts struggling to collect clippings effectively. Overfilling can reduce the mower’s performance, cause clogging, and make the bag heavier and harder to lift. Many lawn care pros empty it when it’s about two-thirds full.
FAQ: What should I do if my grass catcher gets clogged?
If your grass catcher clogs, immediately turn off the mower and disconnect the spark plug wire. Then, carefully clear any packed grass from the discharge chute and the catcher’s opening. Often, clogs happen when mowing very tall or wet grass, so try to avoid those conditions.
FAQ: Is it better to bag or mulch grass clippings?
Both bagging and mulching have benefits. Bagging provides a pristine, clippings-free lawn. Mulching, however, returns valuable nutrients to the soil, acting as a natural fertilizer. The “better” option depends on your preference, grass condition, and desired lawn appearance. Some experts suggest alternating between the two methods for optimal lawn health.